



Table of Contents
- Hail Damage vs Wind Damage Repair Costs: What’s Different?
- Signs of Wind Damage vs Hail Damage on Shingles
- Cost Factors: Hail vs Wind Roof Repairs Compared
- Insurance Deductible Strategy: When to File a Claim
- How to Document Storm Damage for Insurance Claims
- Roof Insurance Claim Process Steps: What to Expect
- Common Repair Mistakes and How to Avoid Them
- Conclusion: Next Steps for Your Roof
- Frequently Asked Questions
Last Updated: September 5, 2026
Hail Damage vs Wind Damage Repair Costs: What’s Different?
Understanding hail damage repair vs wind damage repair costs starts with recognizing these are two fundamentally different claim types.
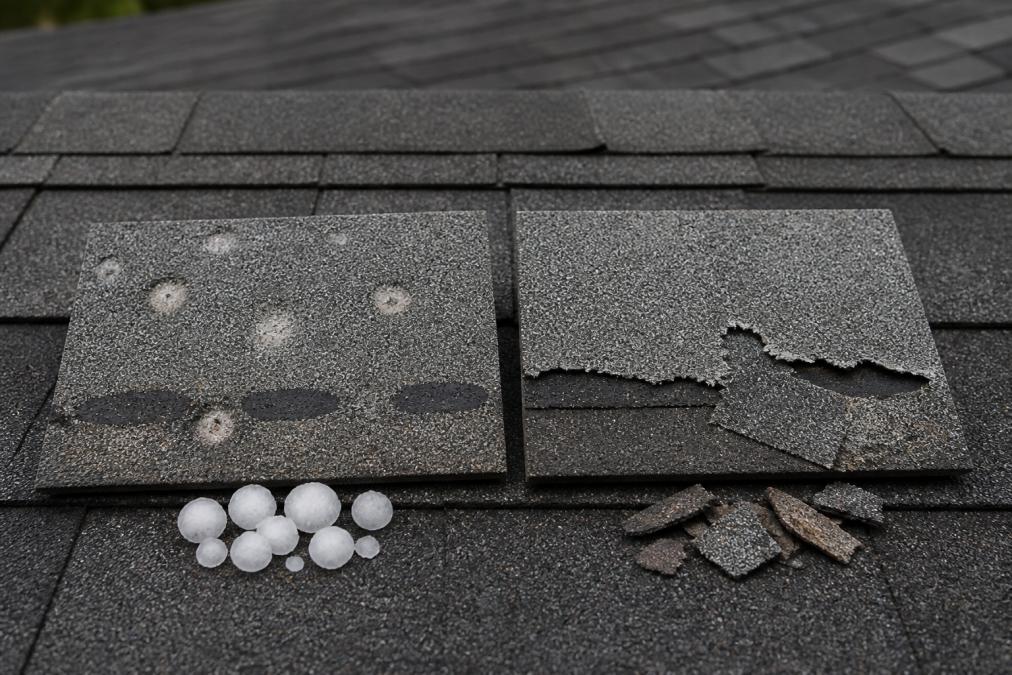
Hail damage is surface impact: hailstones bruise the shingle mat, knock granules loose, and create distinct impact marks. Wind damage is structural displacement: high winds lift, curl, and tear shingles away, often exposing decking. Hail damage often qualifies for full roof replacement under insurance, while isolated wind damage might only require spot repairs.
Signs of Wind Damage vs Hail Damage on Shingles
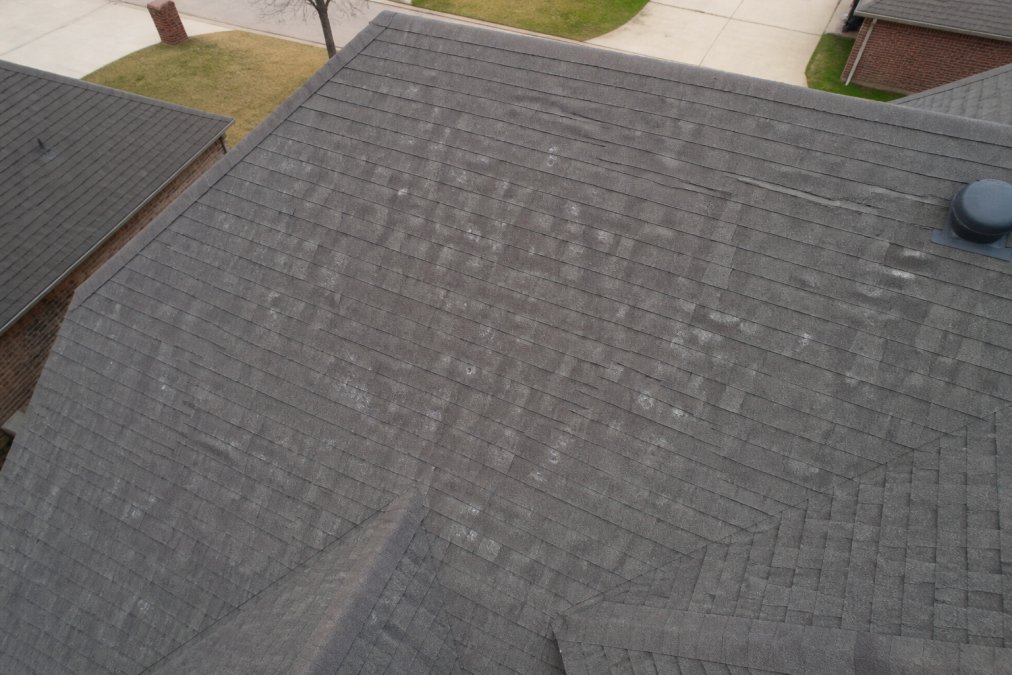
Wind and hail leave distinct signatures on asphalt shingles.
Hail damage signs: Randomly scattered impact marks with no pattern. Bruised or softened shingle areas where the mat is compressed. Granule loss concentrated around impact points. In severe cases, the fiberglass mat may be exposed or torn. Hail damage rarely follows a straight line and typically affects all roof slopes facing the storm’s direction.
Wind damage signs: Shingles lifted at the edges, curled tabs, or completely missing shingles. Look for creasing or bending where shingles flexed without breaking. Wind damage concentrates along roof edges, ridges, and valleys where uplift forces are strongest. If you see shingles in the yard and bare decking on the roof, that’s wind damage.
The complication? Most storms produce both. A severe thunderstorm with 60 mph gusts and golf-ball-size hail leaves a mixed signature. That’s why a professional inspection matters. According to [the Insurance Institute for Business & Home Safety guidance on storm damage(/blog/signs-of-storm-damage-on-roof-a-2026-homeowners-guide/) assessment | ibhs.org], proper damage identification requires distinguishing between cosmetic granule loss and functional shingle damage, since insurance policies typically only cover functional impairment.
Never climb onto a wet or steep roof to inspect damage yourself. Slip-and-fall injuries spike after storms, and walking on hail-damaged shingles can worsen the damage and void your claim. Let a professional inspector handle it.
Cost Factors: Hail vs Wind Roof Repairs Compared
The real question is how hail and wind stack up on the same roof, materials, and policy. The answer comes down to measurable differences in labor, materials, and adjuster logic.
The core cost driver is scope, not severity. Hail damage is random and widespread, affecting every slope facing the storm. Wind damage is directional and localized, concentrating on ridges, edges, and valleys. That single difference changes the estimate from a few hundred dollars to several thousand.
Direct Comparison: Hail vs. Wind on a 2,000 sq. ft. Asphalt Shingle Roof
| Cost Factor | Hail Damage | Wind Damage |
|---|---|---|
| Typical damage pattern | Random impacts across all slopes | Lifted/curled shingles on specific zones |
| Common repair scope | Full roof replacement | Spot repair or partial replacement (one or two slopes) |
| Labor intensity | High, full tear-off and re-decking if mat is exposed | Moderate, targeted shingle replacement |
| Material cost | Full shingle bundle count (approx. 60-70 bundles) | 5-15 bundles for affected zones |
| Underlayment replacement | Typically required on all slopes | Only where shingles were removed |
| Flashing and vent work | Often included in full replacement | Rarely needed unless wind lifted flashing |
| Adjuster’s default position | Full replacement if granule loss is functional | Repair only unless decking is exposed |
The material cost gap is the most predictable. A full replacement for a 2,000 sq. ft. home typically requires 60-70 bundles of architectural shingles. A wind repair on one slope might require 10-15 bundles, landing at 20-30% of full replacement cost, assuming the damage is truly isolated.
Labor rates change the math on steep slopes. Roofs with a 6/12 pitch or higher require additional safety equipment and slower work, so contractors typically add 10-15% to labor regardless of damage type.
Dent density is the hail-specific variable most estimates miss. A roof with 10 scattered impacts per square foot may qualify for spot repairs under some policies. A roof with 50+ impacts per square foot, common with golf-ball-size hail, has lost structural integrity across the mat, pushing the claim from repair to replacement. Wind damage has no equivalent metric; it’s purely about whether shingles are lifted, creased, or missing.
Decking exposure is the wind-specific cost multiplier. When wind tears shingles off completely, the plywood decking underneath is exposed to rain. If saturated or rotted, it must be replaced before new shingles go down. Decking replacement runs roughly $2-$4 per square foot and is almost always out-of-pocket because policies typically exclude pre-existing rot or water damage. A wind repair that starts at $800 can jump to $2,500 if decking replacement is needed.
The age of the roof shifts the comparison. On a roof older than 15 years, hail damage is more likely to cause mat exposure because shingles have lost flexibility. Most contractors recommend full replacement on roofs older than 15 years with either damage type, because the repair will not outlast the remaining shingle life.
The Unique Angle: Why Hail Claims Are Bigger Than Wind Claims
Here is the pattern adjusters see but most homeowners don’t: hail damage is a binary event, either the roof is compromised across the surface or it isn’t. Wind damage is a gradient, it can be a single missing shingle or a full ridge failure. Hail claims are more likely to result in full replacement payouts, while wind claims are more likely to be settled as repairs.
When comparing hail vs. wind repair costs, ask your contractor two questions: (1) What is the dent density or impact count per square foot? (2) Is any decking exposed? The answers will tell you whether you’re looking at a repair or a full replacement before the adjuster even arrives.
Insurance Deductible Strategy: When to File a Claim
The decision to file is not about whether you have damage, it’s about whether the damage exceeds your deductible by enough to justify the risk of a premium increase.
Step 1: Know Your Deductible Type
Most policies fall into one of two categories:
- Flat dollar deductible: A fixed amount, typically $500-$2,500, that you pay before insurance kicks in.
- Percentage deductible (wind and hail): A percentage of your dwelling coverage, typically 1%-5%. On a $300,000 dwelling policy, a 2% deductible is $6,000, not $600.
If you have a percentage-based wind and hail deductible, check your policy before calling your agent. Many homeowners assume they have a $1,000 deductible when they actually have a 2% deductible that applies specifically to hail and wind claims. That misunderstanding leads to shock when the settlement arrives.
Step 2: Run the Numbers on a Hail Claim
Hail damage is almost always a full-surface event. If the adjuster confirms functional hail damage (granule loss with mat exposure), the repair cost will typically exceed any deductible.
| Damage Severity | Estimated Repair Cost | Deductible | Financial Decision |
|---|---|---|---|
| Light (scattered granule loss, no mat exposure) | $500-$1,500 | $1,000 flat | Pay out of pocket if under $1,000; file if over |
| Moderate (visible bruising, granule loss on multiple slopes) | $3,000-$7,000 | $1,000 flat | File the claim, repair cost exceeds deductible 3-7x |
| Severe (mat exposed, fiberglass torn) | $8,000-$15,000 | 2% of dwelling ($6,000) | File only if repair cost exceeds deductible; otherwise negotiate a repair scope |
The key threshold: If your repair estimate is less than 2-3 times your deductible, the claim may not be worth it. Filing a $2,000 repair on a $1,000 deductible nets you $1,000, but risks a premium increase of 10-20% for 3-5 years. restoration versus replacement.
Step 3: Run the Numbers on a Wind Claim
Wind damage is where deductible strategy matters most, because repair costs can fall below your deductible entirely.
| Wind Damage Scenario | Estimated Repair Cost | Deductible | Financial Decision |
|---|---|---|---|
| 3-5 lifted shingles on one slope | $300-$800 | $1,000 flat | Pay out of pocket, do not file |
| 1-2 slopes with missing shingles and exposed decking | $1,500-$3,500 | $1,000 flat | File if decking replacement is needed; otherwise compare against premium risk |
| Full ridge failure with decking exposure across multiple zones | $4,000-$8,000 | 1% of dwelling ($3,000) | File, the damage is structural and will worsen |
The wind-specific trap: A small wind repair you pay out of pocket today can become a full replacement claim next storm. If wind lifted shingles, the underlying decking may have been exposed to rain for days, weakening it and surrounding shingles.
Step 4: The Multi-Claim Penalty
Insurance companies track claim frequency. Two claims in a 3-year period, even if both are legitimate, can trigger non-renewal or a significant premium surcharge. The National Association of Insurance Commissioners consumer guide on roof claims advises policyholders to consider the long-term cost of filing, not just the immediate payout.
The practical rule most adjusters use: If the repair cost is less than 2x your deductible, pay out of pocket. If it’s more than 3x, file the claim.
Step 5: The Contractor’s Role in the Decision
A reputable contractor will give you a written estimate before you call your insurance company. That estimate is your decision tool: below your deductible, you have your answer; above it, you have documentation to support the claim.
Before filing any claim, get a written repair estimate from a licensed local contractor. Compare that estimate against your deductible, and check whether you have a percentage-based wind and hail deductible. If the estimate is less than 2x your deductible, the math usually says pay out of pocket. If it’s more than 3x, file the claim. Between those numbers, weigh your claim history and the likelihood of future storms.
How to Document Storm Damage for Insurance Claims
Knowing how to document storm damage for insurance claims is the difference between a smooth settlement and a months-long battle.
Start with safety. Photograph the exterior from the ground using a zoom lens or drone. Capture wide shots of the entire roof, then close-ups of specific damage. For hail, place a coin or ruler next to impact marks to show scale. For wind, photograph lifted shingles from multiple angles and collect any shingles that blew off.
Document the date of the storm and save any weather reports or radar images that confirm hail or high winds in your area on that date. The Federal Emergency Management Agency guidance on documenting disaster damage recommends photographing damage before any temporary repairs, since adjusters need to see the original condition. If you make emergency repairs to prevent water intrusion, keep receipts and photograph the pre-repair condition first.
Create a written inventory of every damaged area, noting the roof slope, damage type, and approximate number of affected shingles. This documentation becomes the foundation of your repair estimate and gives your contractor the details needed to negotiate with the adjuster.
Roof Insurance Claim Process Steps: What to Expect
The roof insurance claim process follows a predictable sequence.
Step 1: Contact your insurance company. Report the damage promptly. Most policies have time limits for filing claims after a storm.
Step 2: Schedule a professional inspection. Your contractor should inspect the roof before the adjuster arrives, giving you an independent damage assessment and repair estimate to compare against the insurance settlement.
Step 3: Meet the adjuster. The insurance adjuster will inspect your roof and write their own estimate. Having your contractor present ensures nothing gets missed.
Step 4: Review the settlement. Compare the adjuster’s estimate against your contractor’s assessment. If the adjuster missed damage, your contractor can request a supplement.
Step 5: Approve and schedule repairs. Once the claim is approved, coordinate with your contractor on timing. Storm season creates backlogs, so early scheduling matters.
The key insight: your contractor works for you, not the insurance company. A reputable contractor like Rescue Roofing communicates directly with the adjuster, provides accurate aerial quotes documenting the full extent of damage, and advocates for a settlement that covers the actual repair scope.
Common Repair Mistakes and How to Avoid Them
The most expensive mistakes happen after the storm, not during it.
Mistake 1: Hiring a storm chaser. Out-of-state contractors who appear after major storms often do subpar work and disappear before warranty issues surface. Verify your contractor’s local presence, licensing, and insurance before signing anything.
Mistake 2: Accepting the first estimate. If your contractor’s assessment and the adjuster’s estimate differ significantly, request a supplement.
Mistake 3: Delaying temporary repairs. A small leak becomes major water damage if you wait weeks for the full repair. Cover exposed areas with tarps immediately and document everything for your claim.
Mistake 4: Ignoring the fine print on your policy. Check whether you have a separate wind and hail deductible and what percentage it represents.
Mistake 5: Choosing the cheapest bid. Roof replacement costs vary widely, but the lowest bid often means lower-quality materials, rushed labor, or insufficient insurance coverage. A roof is a 20-year investment.
Conclusion: Next Steps for Your Roof
Understanding hail damage repair vs wind damage repair costs comes down to recognizing that every storm leaves a unique signature and every policy has its own rules.
If your roof took damage in a recent storm, start with a professional inspection before calling your insurance company.
Rescue Roofing provides accurate aerial quotes that document the full extent of storm damage, assists with insurance claim filing, and handles communication with insurance companies and adjusters on your behalf. With 24-hour availability and financing options available, we help Tulsa homeowners move from storm damage to a secure roof without the stress. Call us today to schedule your inspection.
Frequently Asked Questions
Is it worth it to get hail damage repaired?
Yes, in most cases. Unrepaired hail damage can compromise your roof’s protective granules, accelerating shingle deterioration and leading to leaks. If your comprehensive coverage includes hail damage, filing a claim typically costs only your deductible. Delaying repairs risks more extensive structural issues, including damage to the underlayment and decking, which can turn a manageable repair into a full replacement.
Does claiming hail damage increase insurance premiums?
Filing a claim for hail damage can sometimes lead to higher premiums, but it depends on your insurer, state regulations, and claim history. Using an insurance deductible strategy, such as weighing the repair cost against your deductible and potential premium increase, helps you decide if filing is financially worthwhile.
What are the primary differences in repair techniques for hail and wind damage?
Hail damage typically requires replacing individual impacted shingles or sections, since the impact compromises the shingle’s integrity even if it looks intact. Wind damage often involves re-securing lifted shingles, replacing missing ones, and repairing flashing around edges and penetrations. A professional inspection can identify whether the damage is isolated or widespread, which directly impacts the repair estimate and claim process.
How do I know if my roof damage is from hail or wind for my claim?
Look for the distinct signs of wind damage vs hail damage on shingles. Hail leaves random, bruise-like dents or cracks where granules are knocked off. Wind typically lifts or curls shingle edges, or removes them entirely, often along a specific roof slope facing the storm. Documenting these signs with photos before the adjuster arrives supports your claim and helps ensure you receive a fair repair estimate.
This article was written using GrandRanker