




Table of Contents
- Review Your Insurance Policy Coverage Before Filing
- Document Your Roof Damage With a Damage Inspection Checklist
- Understanding Actual Cash Value vs. Replacement Cost Value
- Steps to Filing Your Roof Insurance Claim
- Roof Insurance Claim Timeline: What to Expect
- Common Roof Insurance Claim Denial Reasons and How to Appeal
- Protecting Yourself From Storm Chasers and Predatory Contractors
- Conclusion
Last Updated: August 15, 2026
Review Your Insurance Policy Coverage Before Filing
Before filing a roof insurance claim, understand what your policy actually covers. Open your policy document and locate the dwelling coverage section to identify which perils are covered, wind, hail, storm damage, and fire are common, but coverage varies widely. Some policies exclude certain perils or have specific limitations based on roof age.
Pay attention to your policy limits (the maximum your insurer will pay) and your deductible (what you pay out of pocket). If your limit is $15,000 but replacement costs $25,000, you’re responsible for the difference. Look for exclusions related to wear and tear or gradual deterioration. Insurance typically won’t cover damage from poor maintenance, but sudden damage from a covered peril like a hail storm is usually covered.
Keep a copy of your policy in an accessible place. When you contact your insurance provider, having your policy number and coverage details ready speeds up the process significantly.
Document Your Roof Damage With a Damage Inspection Checklist
Documentation is everything when filing a roof insurance claim. Insurance adjusters make decisions based on evidence, and thorough documentation strengthens your position.
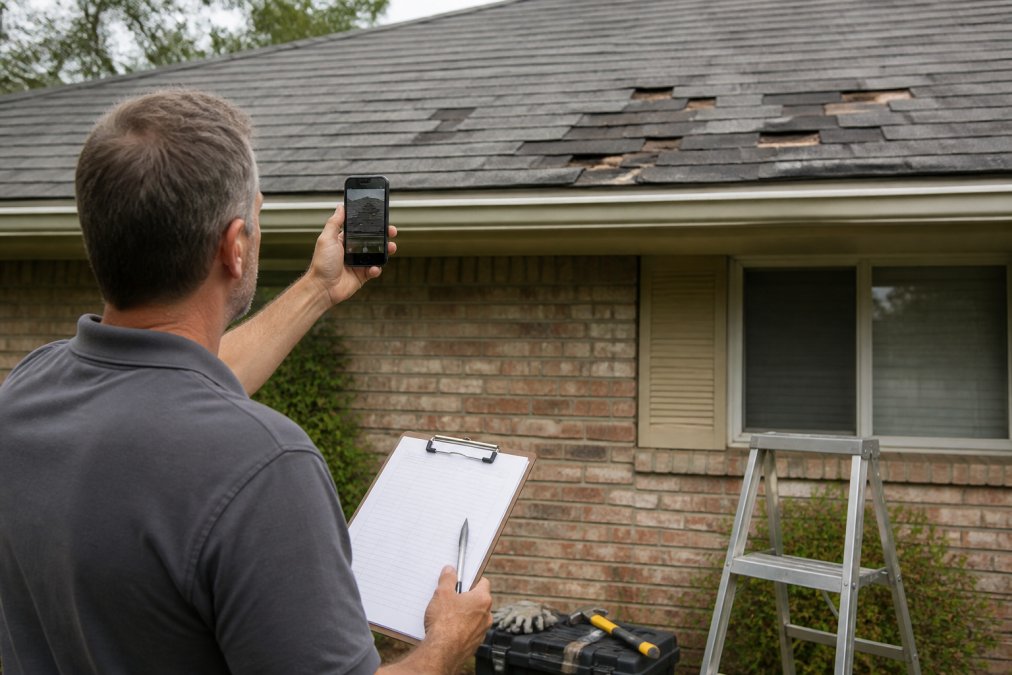
Photograph all visible damage from multiple angles, including close-ups of damaged shingles, missing flashing, hail dents, and water stains, plus wide shots for context. Use early morning or late afternoon light, which reveals damage better than midday sun. Document the date and time you discovered the damage to establish when it occurred.
Create a detailed checklist of all damage:
- Missing or damaged shingles (count and location)
- Bent or dented flashing
- Visible water stains on ceilings or walls
- Damaged gutters or downspouts
- Granule loss (shingle material in gutters)
- Exposed underlayment or wood
- Holes or punctures
- Sagging or uneven roof sections
Measure damage where possible. For hail, note hailstone size; for wind, describe direction and severity. Keep receipts for temporary repairs, these mitigation efforts are typically covered by insurance. Avoid permanent repairs before the adjuster inspects, as this can complicate your claim.
Do not climb on your roof yourself to document damage. Photograph from the ground or wait for a professional inspector. The risk isn’t worth it.
Understanding Actual Cash Value vs. Replacement Cost Value
This distinction determines how much money you’ll receive from your insurance company.
Actual Cash Value (ACV) is what your roof is worth today, accounting for depreciation. If your roof is 15 years old with a 25-year lifespan, the insurance company calculates replacement cost and subtracts depreciation. You receive the depreciated amount, typically significantly less than replacement cost.
Replacement Cost Value (RCV) is what it actually costs to replace your roof with new materials of similar quality, with no depreciation deduction. A roof costing $20,000 to replace might have an ACV of only $8,000 if aged significantly. With RCV coverage, you’d receive $20,000; with ACV, you’d receive $8,000 and cover the remaining $12,000 yourself.
Check your policy to see which type of coverage you have. Many standard homeowners policies use ACV, while premium policies offer RCV. If you have ACV coverage and your roof needs replacement, you’ll face significant out-of-pocket expense.
RCV coverage is worth the premium increase if you own an older home. The difference in payout during a claim often exceeds years of premium increases.
Steps to Filing Your Roof Insurance Claim
Filing a roof insurance claim follows a logical sequence. Understanding each step helps you navigate the process efficiently and improves your chances of approval.
Step 1: Contact Your Insurance Provider
Call your insurance company as soon as possible after discovering roof damage. Most policies require prompt notification; waiting weeks or months can complicate your claim. Have your policy number ready and provide a clear description of what happened and when you discovered the damage. The insurance company will open a claim file, assign a claim number, and provide information about next steps.
Step 2: What to Say to Insurance Adjuster for Roof Damage
When the insurance adjuster contacts you, be clear and factual. Describe damage in specific terms: instead of "my roof is damaged," say "I have missing shingles on the north side, visible water stains on the master bedroom ceiling, and dents consistent with hail damage."
Provide your documentation, photographs, measurements, and damage checklist. Walk them through the timeline of discovery. Answer questions directly without speculation. Don’t exaggerate or embellish damage, adjusters spot inconsistencies, and dishonesty undermines your credibility. Mention any temporary repairs you’ve made to prevent further damage, as these mitigation efforts are covered and show responsibility.
Step 3: Work With a Professional Roof Inspection
A professional roof inspection provides objective documentation that strengthens your claim. Unlike your own photographs, a professional inspector’s report carries weight with insurance companies because it comes from a neutral third party with expertise.
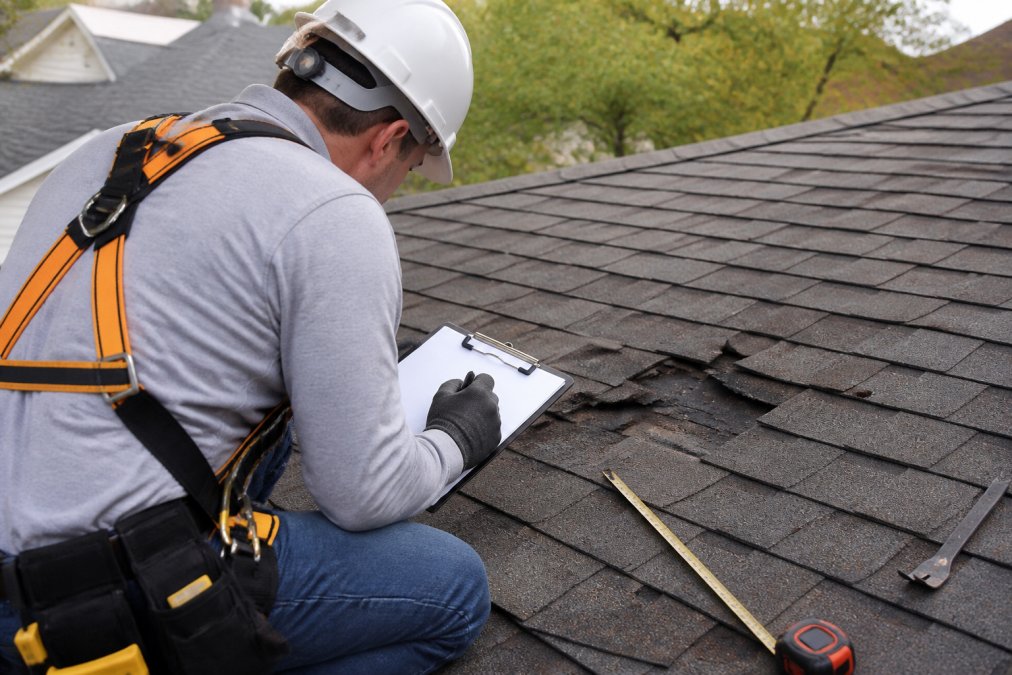
Schedule an inspection with a licensed roofing contractor or professional inspector. They’ll examine the roof thoroughly, identify all damage, and provide a detailed written report with photographs and measurements. The inspector will note damage not visible from the ground and provide a repair or replacement estimate. Ask your adjuster if they recommend inspectors, but you have the right to hire your own inspector for additional documentation supporting your claim.
Step 4: Submit Your Proof of Loss Documentation
Proof of loss is a formal document itemizing all damage and repair or replacement costs. Your proof of loss should include a complete list of damaged items, estimated costs for each, photographs, professional inspection reports, receipts for temporary repairs, and documentation of when damage occurred and was discovered.
Be thorough and specific. Instead of "roof damage," list "missing shingles (approximately 20 on north slope), damaged flashing around chimney, and water damage to master bedroom ceiling." Submit within the timeframe specified in your policy, missing this deadline can result in claim denial. Keep copies of everything you submit.
Roof Insurance Claim Timeline: What to Expect
Understanding the typical roof insurance claim timeline helps you plan and manage expectations. The process usually takes 30 to 90 days from start to finish.
Week 1: Initial Report and Claim Opening
You report damage and the company opens a claim file and assigns a claim number.
Weeks 2-3: Adjuster Inspection
The adjuster inspects damage, documents findings, and prepares an initial estimate. You provide documentation and answer questions.
Weeks 3-4: Estimate Review
The insurance company reviews the adjuster’s estimate and your proof of loss, potentially requesting additional documentation.
Weeks 4-6: Claim Decision
The company approves, denies, or requests additional information. If approved, payment is issued or scheduled. If denied, a written explanation is provided.
Weeks 6-8: Payment and Repairs
Once approved, you receive payment (less your deductible) and can hire a contractor for repairs.
Complex claims can extend this timeline. Stay in regular contact with your adjuster, prompt responses keep your claim moving forward.
Stay in regular contact with your adjuster during this timeline. Prompt responses to requests and follow-up questions keep your claim moving forward. Delays usually come from missing documentation or slow policyholder responses.
Common Roof Insurance Claim Denial Reasons and How to Appeal
Understanding why claims get denied helps you avoid these pitfalls and know how to respond if rejected.
Denial Reason #1: Damage Excluded by Your Policy
Some policies exclude specific perils or have roof coverage limitations. If your policy excludes wind damage and wind caused your damage, the claim will be denied. Review your policy exclusions before filing. If you believe the exclusion is unfair or the damage falls under a covered peril, appeal by arguing the damage was caused by a covered peril, not an excluded one.
Denial Reason #2: Pre-Existing Damage or Wear and Tear
Insurance doesn’t cover damage from aging, poor maintenance, or gradual deterioration. To appeal, provide evidence that the damage is recent and caused by a specific incident, not gradual wear. Professional inspection reports help distinguish between old and new damage.
Denial Reason #3: Policyholder Failure to Mitigate
If you fail to prevent further damage after an incident, the insurance company can deny or reduce the claim. Make temporary repairs immediately to prevent water damage and further deterioration.
Denial Reason #4: Insufficient Documentation
If your proof of loss is vague or lacks supporting documentation, resubmit with detailed photographs, professional inspection reports, and specific damage descriptions.
How to Appeal a Roof Insurance Claim Denial
Request a written explanation of the denial. Review the letter carefully and identify the exact reason. Gather additional evidence contradicting the denial reason. Submit your appeal in writing, referencing the claim number and denial date, with new evidence and a clear argument for why the denial was incorrect.
If the insurance company denies your appeal, you can file a complaint with your state’s insurance commissioner or hire a public adjuster to represent your interests. A public adjuster is a licensed professional who advocates for policyholders in disputes with insurance companies, typically charging a percentage of additional recovered payout.
Don’t ignore a denial. You have a limited time to appeal, typically 30 to 60 days depending on your state. Missing this deadline forfeits your right to challenge the denial.
Protecting Yourself From Storm Chasers and Predatory Contractors
After a major storm, contractors appear quickly offering to handle your insurance claim and roof repair. Many "storm chasers" use aggressive tactics and sometimes engage in fraudulent practices.
Red Flags to Watch For:
Storm chasers knock on doors before homeowners file claims, pressure you to sign contracts immediately, promise to handle everything with your insurance company, and guarantee maximum payout. They offer to cover your deductible or claim special relationships with adjusters. Legitimate contractors don’t pressure immediate decisions, guarantee claim approval, or offer to cover deductibles.
How to Protect Yourself:
Get multiple estimates from established local contractors before signing anything. Verify they’re licensed, insured, and have positive reviews. Ask for references and contact them. Never sign a contract giving the contractor power of attorney over your insurance claim, you need to maintain control. Read contracts carefully before signing and be skeptical of contractors guaranteeing specific insurance payouts or claiming special adjuster relationships.
Work with contractors who have established local reputations. Rescue Roofing, for example, understands the claims process and can assist with documentation and communication with your adjuster, but they don’t make false promises about claim outcomes.
Take your time selecting a contractor. The lowest bid isn’t always the best choice. A reputable contractor with fair pricing and a solid local reputation is worth the investment.
Filing a roof insurance claim is manageable when you understand the process and prepare properly. Start by reviewing your policy to understand coverage and limits. Document damage thoroughly with photographs and professional inspections. Communicate clearly with your adjuster and submit complete proof of loss documentation. Understand the difference between Actual Cash Value and Replacement Cost Value so you know what to expect financially.
If your claim is denied, you have the right to appeal with additional evidence. Protect yourself from predatory contractors by verifying credentials and taking time to make decisions. When ready to move forward with repairs, work with established local contractors like Rescue Roofing who understand the claims process, assist with documentation and insurance communication, and deliver quality workmanship backed by professional standards. With the right approach and support, you’ll navigate your roof insurance claim successfully.
Frequently Asked Questions
What qualifies as roof damage for insurance coverage?
Most homeowners insurance policies cover sudden, accidental damage from named perils like hail, wind, storms, and falling objects. Damage from fire, lightning, and vandalism typically qualifies. However, gradual wear, age-related deterioration, and lack of maintenance are usually excluded. Review your policy's coverage section to confirm which perils apply. When documenting damage, focus on the cause, storm damage, not normal aging, to strengthen your roof insurance claim.
How long do I have to file a roof insurance claim after a storm?
Most insurance policies require you to file within 1-3 years of the damage, but don't wait. File your roof insurance claim timeline as soon as possible after a storm. Prompt reporting protects your coverage and prevents disputes about when damage occurred. Delays can complicate investigations and give insurers grounds to question the damage's origin. Contact your insurer within days of discovering roof damage to start the claims process immediately.
What should I avoid saying to a roof insurance adjuster?
Avoid admitting fault, exaggerating damage, or speculating about causes. Don't say 'the roof was already leaking' or 'we've been meaning to fix this for years', this suggests pre-existing conditions that may not be covered. Never accept the first settlement offer without review. Don't sign documents you don't understand. When speaking with an adjuster, stick to facts: describe what happened, when you discovered the damage, and provide your documentation. Let your evidence speak rather than your interpretation.
What is the difference between Actual Cash Value and Replacement Cost Value?
Actual Cash Value (ACV) reimburses you for the depreciated cost of your roof based on its age and condition. Replacement Cost Value (RCV) covers the full cost to replace your roof with new materials at today's prices. RCV typically costs more in premiums but provides better protection. For example, a 15-year-old roof might have an ACV of $5,000 but an RCV of $12,000. Check your policy to see which you have, RCV is preferable for roof claims since replacement costs are substantial.
Why do insurance companies deny roof damage claims?
Common roof insurance claim denial reasons include: damage from excluded perils (wear and tear, lack of maintenance), failure to maintain the roof, pre-existing conditions not disclosed, missing documentation, or exceeding policy limits. Some denials occur because the adjuster determines damage is cosmetic rather than functional. To avoid denial, document everything with photos, keep maintenance records, disclose all known issues when applying, and respond promptly to adjuster requests. If denied, you have the right to appeal with additional evidence or hire a public adjuster.
What documentation do I need for a roof insurance claim?
Gather photographic evidence of all damage from multiple angles, your insurance policy details, a written description of the incident, weather reports confirming the storm date, contractor estimates for repairs, and proof of loss documentation. Your roof damage inspection checklist should include photos of interior water damage, attic moisture, missing shingles, and structural damage. Keep receipts for any emergency mitigation measures (tarping, water removal). Organize this documentation chronologically and provide copies to your adjuster, never originals.
Can I file a supplemental claim if the adjuster missed damage?
Yes. If your initial roof insurance claim settlement doesn't cover all damage discovered later, you can file a supplemental claim. This is common when additional damage becomes apparent after the first inspection or when contractors uncover hidden issues during repairs. Document the newly discovered damage with photos and a contractor's report. Submit your supplemental claim within your policy's time limits. However, be cautious, if damage appears unrelated to the original storm, the insurer may deny it as a separate incident.
This article was written using GrandRanker