



Table of Contents
- Why Severe Storms Cause Roof Leaks
- Signs of Roof Storm Damage to Check Before the Next Storm
- Emergency Steps When You Suspect a Leak
- How to Tarp a Roof Safely During a Storm
- Filing a Roof Insurance Claim: What to Document First
- Prevent Roof Leaks with Year-Round Maintenance
- When to Call a Professional
- Frequently Asked Questions
Last Updated: September 25, 2026
Why Severe Storms Cause Roof Leaks
Heavy rain does not create leaks on a sound roof, it exposes weak points that were already there. Wind-driven rain forces water sideways and upward, past shingles, under flashing, and into gaps that stayed dry during lighter storms.
Signs of Roof Storm Damage to Check Before the Next Storm
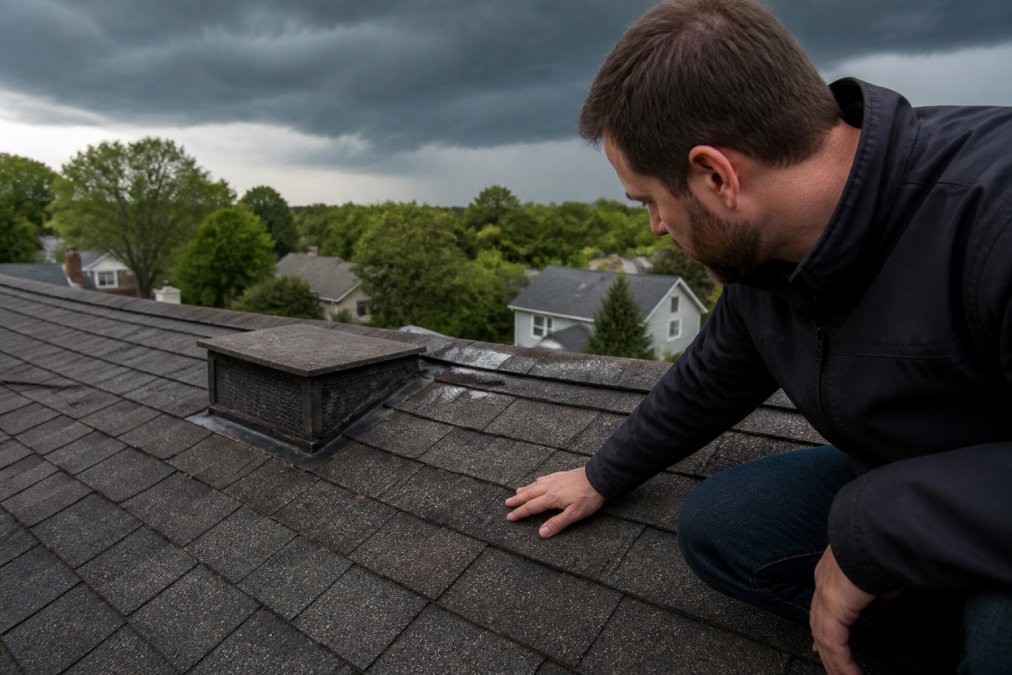
Knowing the signs of roof storm damage lets you act before the next system rolls in. A short inspection after every major storm catches most problems while they are still cheap to fix.
Check for these warning signs:
- Missing, cracked, or curling shingles
- Granules collecting in gutters or at downspout outlets
- Dented or bent flashing around chimneys and vents
- Dark stains on ceilings or walls
- Sagging areas along the roof line
- Daylight visible through the attic roof boards
Emergency Steps When You Suspect a Leak
When water is actively coming in, your first job is containment, not repair: stop the water from spreading and protect what matters most inside.
Contain the Water and Protect Your Belongings
Move furniture, electronics, and rugs out of the affected area first; cover anything you cannot move with plastic sheeting.
Then contain the drip:
- Place buckets or bins under active drips
- Lay towels or old blankets along the water’s path
- Use a tarp or plastic sheet to redirect water away from walls
- Poke a small hole in a bulging ceiling to release trapped water safely
Never ignore a bulging ceiling. Ceiling sag means water is pooling above the drywall, and the weight can bring the whole section down without warning.
Electrical Safety Around a Leaking Roof
Water and electricity are a dangerous combination. If a leak is near light fixtures, outlets, or wiring, shut off power to that area at the breaker box first.
Follow these safety rules:
- Never touch a light switch or outlet with wet hands
- Stay out of any room where water is touching electrical fixtures
- Do not use a wet-dry vacuum near standing water and live wiring
- Call a licensed electrician if you are unsure whether it is safe
How to Tarp a Roof Safely During a Storm
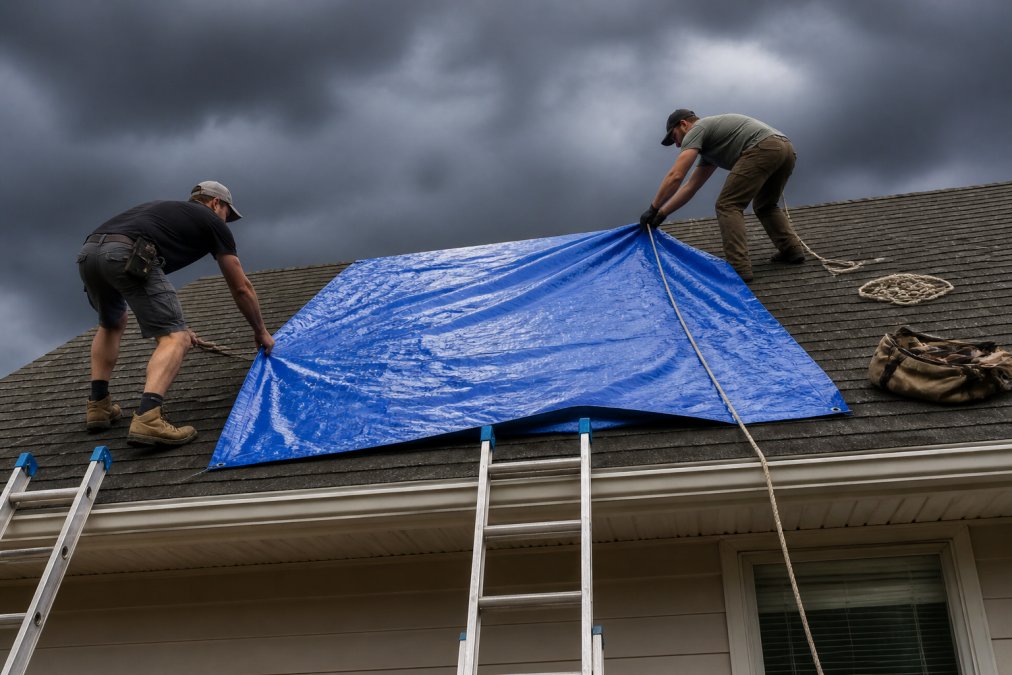
Emergency tarping is a temporary fix to stop water ingress until a roofer makes permanent repairs. The goal is to shed water off the roof, not seal it perfectly. But the most important rule comes first: if the storm is still active, or the roof is wet, steep, or more than one story, do not go up there. Falls are the leading cause of storm-related roofing injuries, and no tarp is worth a trip to the emergency room.
Path 1: Ground-Level and Interior Patching (No Roof Access)
This is the option most guides skip. You can slow or stop many leaks without ever leaving the ground.
From inside the attic or top floor:
-
Locate the drip and trace it uphill along the roof deck to the entry point. Water runs down rafters, so the source is usually higher than the drip.
-
Apply a bead of roofing sealant (butyl or polyurethane caulk rated for wet surfaces) directly over the suspected gap from inside. It will not be pretty, but it will slow the flow.
-
For larger openings, press a piece of self-adhering flashing tape (often sold as peel-and-stick roof tape) over the gap from the underside of the deck.
-
Place a bucket or tarp below to catch anything the patch does not stop.
-
If the leak is near the roof edge or a gutter, you may reach it from a ladder on stable ground. Never lean a ladder against a gutter, it will bend. Lean it against the wall or use a standoff stabilizer.
-
Apply the same wet-surface sealant or flashing tape to visible gaps at the roof edge, drip edge, or where flashing meets the wall.
-
Do not attempt this in wind above roughly 20 mph or during lightning.
Never use a pressure washer, garden hose, or spray sealant on a roof during a storm. Water and electricity do not mix, and a wet roof surface is slick even when the rain has stopped.
Path 2: Tarping the Roof (Only When Conditions Are Safe)
Only attempt this if the storm has fully passed, the roof is dry enough to walk on, the pitch is low, and you have a spotter on the ground. If any condition is missing, stay off the roof and call a professional.
Here is how to tarp a roof:
- Choose a tarp large enough to overlap the damaged area by at least 3 to 4 feet on every side.
- Lay the tarp so it runs from the peak down over the edge, letting water flow off naturally.
- Secure it with roofing nails or screws driven through wood strips placed on top of the tarp.
- Weight the edges with sandbags or boards if you cannot fasten into the roof.
- Check that no part of the tarp creates a pocket where water can pool.
Run the tarp over the ridge line, not just across the damaged spot. Water that gets under a flat-laid tarp will travel farther than the original leak ever did.
What to Have on Hand Before the Next Storm
Emergency patching goes faster if the supplies are already in the garage. A basic storm kit includes:
- One or two 20×30-foot tarps (enough to cover most single-story roof sections)
- Two tubes of wet-surface roofing sealant and a caulk gun
- One roll of self-adhering flashing tape
- A cordless drill with roofing screws and 1×4 wood strips
- Sandbags or weighted buckets
- Work gloves, non-slip shoes, and a headlamp
Filing a Roof Insurance Claim: What to Document First
Filing a roof insurance claim goes smoother when you document everything before anyone touches the roof. Most delays trace back to missing photos, vague damage descriptions, or repairs made before the adjuster saw the damage. The checklist below matches the structure most adjusters work from, so building your file to it saves weeks.
The Pre-Repair Documentation Checklist
Work through this list the moment you notice damage, before you tarp, patch, or move anything:
Exterior photos (from the ground):
- Wide shots of each roof slope, taken from at least two corners of the house
- Close-ups of missing, cracked, lifted, or curling shingles
- Close-ups of flashing around chimneys, vents, skylights, and valleys
- Gutters and downspouts, including any granules or shingle debris collected in them
- Any visible dents, punctures, or impact marks (hail, fallen branches, debris)
Interior photos and video:
- The ceiling stain or drip, shot wide enough to show the room and then close enough to show the stain’s edges
- A video pan of the affected room showing the water’s path from ceiling to floor
- Attic shots of the roof deck underside, showing any dark streaks, damp insulation, or daylight through the boards
- Damaged belongings, wet flooring, and any furniture or electronics that were in the water’s path
Written record:
- Date and time you first noticed the leak
- Date and time of the storm that caused it (check your local weather service archive if unsure)
- A one-paragraph description of what you saw, in plain language
- Names of anyone who helped you (contractor, neighbor, family member)
Receipts and records:
- Receipts for tarps, buckets, sealant, or any emergency materials you bought
- Receipts for hotel stays or meals if the home became uninhabitable
- Any prior roof inspection reports or maintenance invoices
Photos taken before repairs begin carry far more weight than ones taken after. If you patch or tarp before documenting, photograph the patch and the area around it, and note in writing that the patch was temporary.
What Adjusters Actually Look For
Claims often get delayed not because the damage is disputed, but because the file is incomplete. Adjusters typically want to see:
- Cause of loss, was it wind, hail, fallen debris, or water intrusion from a named storm? The cause determines whether the claim falls under your dwelling coverage or a separate windstorm or flood policy.
- Date of loss, the storm date, not the date you noticed the leak. These are often different, and the gap matters.
- Pre-existing vs. storm-caused damage, worn flashing that finally failed in a storm may be treated differently than shingles torn off by wind. Document both, and let the adjuster decide.
- Mitigation efforts, what you did to prevent further damage. Most policies require you to take reasonable steps to mitigate, and documenting those steps protects your claim.
A Note on Flood vs. Wind-Driven Rain
Standard homeowners policies typically cover wind-driven rain that enters through storm-created openings, but usually exclude rising water or flooding. If your leak came from water that pooled on the ground and rose into the home, that is a flood claim and generally requires a separate policy. Knowing which category your loss falls into before you file prevents an avoidable denial.
Prevent Roof Leaks with Year-Round Maintenance
The best way to prevent roof leaks is steady maintenance, not last-minute scrambling. A roof checked twice a year handles severe storms far better than one that only gets attention after damage appears. Consistent inspections reveal small vulnerabilities before they escalate, and mastering the process of finding roof leaks ensures that minor issues are addressed well before the next heavy downpour.
- Flashing around chimneys, skylights, and vents
- Shingle edges along ridges and valleys
- Attic insulation for signs of moisture or mold
- Ceiling and wall surfaces for new stains
Gutters, Drainage, and Attic Checks
Clogged gutters are one of the most overlooked causes of water damage. When water cannot drain, it backs up under the roof edge and seeps into the fascia and walls.
Inside the attic, look for:
- Dark streaks or stains on the roof deck
- Damp or matted insulation
- Musty smells, which point to trapped moisture
- Rusted nails or fasteners
When to Call a Professional
Call a professional roofer when damage is beyond a simple patch, when water is near electrical wiring, or when you cannot safely get on the roof yourself. Structural concerns like sagging or soft spots always warrant a professional inspection.
Signs it is time to call in help:
- Damage spans more than a small section of the roof
- You see sagging, soft spots, or signs of structural instability
- Water is entering near electrical fixtures or wiring
- The roof is steep, tall, or hard to access safely
- You have already tarped the roof and water is still getting in
Frequently Asked Questions
How do you stop a leaking roof during heavy rain?
Start by containing the water inside with buckets and towels, then move furniture and electronics away from the drip. If it is safe and the storm has passed, you can tarp the damaged area. Never climb onto a wet roof during active rain or lightning. Once the weather clears, call a professional to inspect and repair the leak source.
What is the best roofing material for high winds?
Impact-resistant shingles and metal roofing hold up best in high winds. In storm-prone areas, look for shingles rated for winds up to 130 mph and metal panels with concealed fasteners. Proper installation matters as much as the material, so hire a contractor who follows local wind-uplift requirements and uses quality underlayment and flashing.
Can I put a tarp on my roof to stop leaks?
Yes, tarping is a common temporary fix after a storm. Use a heavy-duty tarp and secure it with battens and rope, not just nails, to avoid more shingle damage. Only tarp when winds have died down and it is safe to be on the roof. A tarp buys time; it is not a permanent repair, so schedule a professional inspection soon after.
How often should I have my roof inspected for storm damage?
Schedule a professional inspection at least once a year and after any major storm with hail or high winds. Homeowners can do quick visual checks from the ground each season. Regular inspections catch flashing, shingle, and drainage problems early, which is the most reliable way to prevent roof leaks during severe storms.