



Table of Contents
- Does Homeowners Insurance Cover Emergency Tarping?
- Understanding the ‘Duty to Mitigate’ and Temporary Repairs
- Documenting Roof Damage for Insurance
- How to File a Storm Damage Insurance Claim
- Emergency Roof Tarping Cost and Reimbursement
- What Qualifies as a Covered Peril
- Steps to Take Immediately After Roof Damage
- Conclusion
- Frequently Asked Questions
Last Updated: September 3, 2026
Does Homeowners Insurance Cover Emergency Tarping?
When a storm tears through your roof, the clock starts ticking. Water intrusion can cause thousands in damage within hours. The question homeowners ask first is whether their insurance will cover the cost of emergency tarping, and the answer is more nuanced than a simple yes or no.
Does homeowners insurance cover emergency tarping? Most standard homeowners insurance policies do cover temporary repairs like emergency tarping when the damage results from a covered peril, such as wind, hail, or storm damage (iii.org). However, coverage depends on your specific policy language, the cause of the damage, and whether you’ve met your duty to mitigate damages. This guide from Rescue Roofing breaks down exactly what your policy covers, how to document the damage properly, and how to file a claim that actually gets reimbursed.
The process isn’t always straightforward. Insurance companies expect homeowners to take immediate action to prevent further damage, this is called the “duty to mitigate.” Emergency tarping falls squarely into this responsibility. Understanding what qualifies as a covered peril, how to document your damage, and what reimbursement looks like can mean the difference between getting paid back and eating the cost yourself.
Understanding the ‘Duty to Mitigate’ and Temporary Repairs
The “duty to mitigate” is a legal principle embedded in most homeowners insurance contracts (naic.org). It means you’re obligated to take reasonable steps to prevent additional damage after a loss occurs. Emergency tarping is the textbook example of mitigation, it’s temporary, it’s necessary, and it’s exactly what your insurance company expects you to do.
Here’s the critical part: your policy likely requires you to mitigate damages, and failure to do so can actually reduce your claim payout. If a storm damages your roof and you wait three days before tarping it, water damage spreads to your attic, insulation, and interior walls. The insurance company may argue that you failed to mitigate, potentially denying coverage for the secondary water damage. Emergency tarping prevents this domino effect.
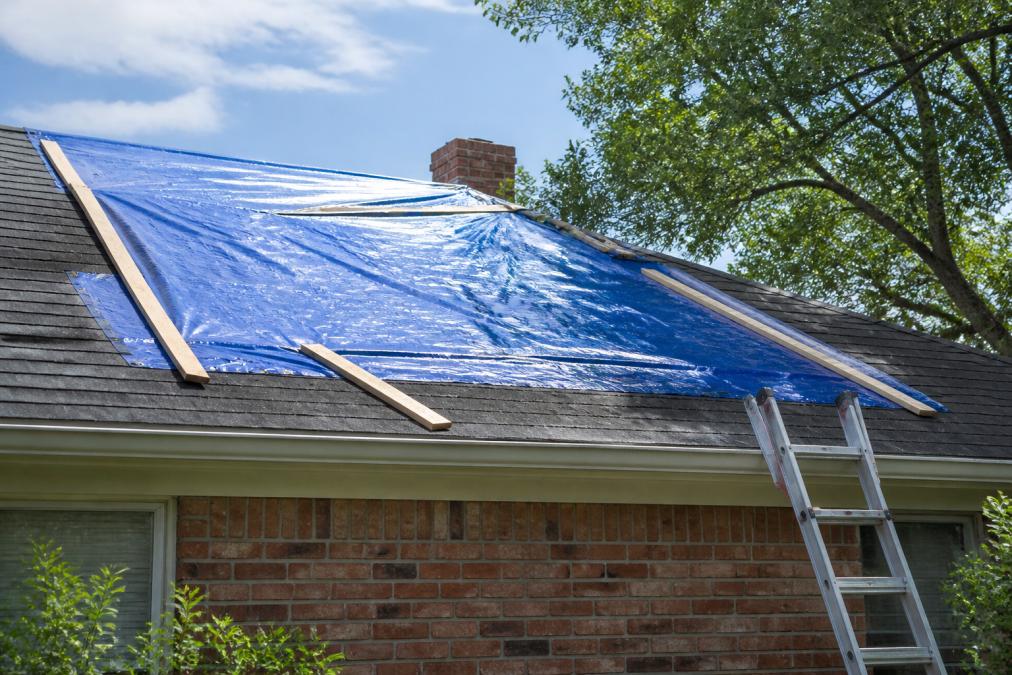
Most homeowners insurance policies classify emergency tarping as a temporary repair, a reasonable, short-term measure to stabilize the property. The cost of tarping is typically reimbursable under the policy’s coverage for the underlying damage. However, the tarping itself is not a separate line item. Instead, it’s considered part of the mitigation process that leads to your primary claim for roof damage.
This is where policy language matters. Some policies explicitly cover emergency repairs and temporary stabilization. Others are silent on the topic, which actually works in your favor, if the policy doesn’t exclude emergency tarping, and the damage is from a covered peril, you have a strong argument for reimbursement. Read your policy’s section on “temporary repairs,” “emergency measures,” or “mitigation of damages.”
Document your tarping decision immediately. Take photos before the tarper arrives, during the work, and after completion. Write down the date, time, and reason for the emergency tarping. This creates a clear record that you acted reasonably and promptly, exactly what an insurance adjuster wants to see.
Documenting Roof Damage for Insurance
Documentation is your strongest defense when filing a claim. Insurance adjusters see hundreds of claims. The ones that get paid quickly are the ones with clear, detailed evidence.
Start by taking photographs and video immediately after the damage occurs. Capture wide shots showing the overall damage pattern, then zoom in on specific areas. For hail damage, photograph the dents from multiple angles and in different lighting. For wind damage, show missing shingles, exposed underlayment, and any structural issues. Include photos of the surrounding area to establish context, show neighboring properties to prove this was a significant storm, not isolated damage.
If emergency tarping has already been installed, photograph it from the ground and, if safe, from a ladder or elevated position. Show the extent of the tarp coverage and any visible damage beneath it. This proves you acted quickly and took the damage seriously.
Write detailed notes about the damage: what caused it, when it occurred, which areas are affected, and what immediate steps you took. Include the date, time, and weather conditions. These notes become part of your claim file and help the adjuster understand the sequence of events.
Next, gather receipts and invoices for the emergency tarping work. This is critical, your insurer will want to know what you paid and who performed the work. Keep the tarping invoice separate from your main claim documentation. It will be referenced when calculating reimbursement.
Do not attempt permanent repairs before the adjuster inspects the damage. Permanent roof repairs made before the insurance company assesses the loss can complicate your claim. The adjuster needs to see the original damage to determine what’s covered. Emergency tarping is fine, it’s temporary. But replacing shingles or patching the roof before the inspection can reduce your payout.
For documenting roof damage, create a simple checklist: photographs from multiple angles, video walkthrough, written notes with date and time, receipts for any emergency work, and a list of affected areas. Organize these materials before calling your insurance company.
How to File a Storm Damage Insurance Claim
Filing a claim for storm damage is a multi-step process. Start by calling your insurance company as soon as possible after the damage occurs. Most insurers have 24-hour claims lines. Report the damage, provide a brief description, and ask about next steps.
Your insurer will assign an adjuster to inspect the property. Schedule this inspection within a few days if possible. The faster the adjuster visits, the fresher the damage evidence and the quicker your claim moves forward. When the adjuster arrives, walk them through the damage, point out the emergency tarping, and provide your documentation.
Be present during the inspection. Answer questions directly and honestly. If the adjuster asks about the cause of the damage, describe what you observed, the wind speed, hail size, or storm intensity. Don’t speculate about things you didn’t witness.
After the inspection, the adjuster will prepare an estimate. This estimate includes the cost of repairs and, if applicable, the cost of emergency mitigation like tarping. Review the estimate carefully. If you disagree with the amount, you have the right to challenge it. Get your own estimate from a qualified contractor, Rescue Roofing can provide an aerial quote that’s accurate and detailed, and submit it to your insurance company.
Once the estimate is approved, your insurance company will issue payment. This payment covers the cost of repairs minus your deductible. The emergency tarping cost is typically included in the overall repair estimate, not as a separate reimbursement.
The key to a successful claim is speed and documentation. Call your insurer immediately, document the damage thoroughly, cooperate with the adjuster, and don’t delay repairs. Emergency tarping demonstrates that you took action to prevent further damage, exactly what insurance companies want to see.
Emergency Roof Tarping Cost and Reimbursement
The cost of emergency tarping varies based on roof size, accessibility, and local labor rates. A typical tarping job for a residential roof might cost anywhere from a few hundred to over a thousand dollars, depending on these factors. However, since the research data on specific pricing is limited, it’s important to get a quote from a local contractor before the emergency occurs. temporary housing coverage.
Here’s the reimbursement process: you pay for the emergency tarping out of pocket, then submit the invoice to your insurance company as part of your claim. The adjuster reviews the invoice to confirm the cost is reasonable and the work was necessary. If approved, the tarping cost is deducted from your overall claim settlement.
This means the tarping cost reduces the amount your insurance company pays for permanent repairs, not increases it. If your roof repair estimate is $8,000 and emergency tarping cost $500, your insurance company will pay $7,500 in repair costs (assuming you’ve met your deductible). The tarping is part of the total loss, not additional coverage.
However, if your deductible is higher than the tarping cost, you may not see direct reimbursement. For example, if your deductible is $1,000 and tarping cost $500, you’re responsible for the full $1,000 deductible. The tarping cost is absorbed into this amount.
This is why understanding your deductible matters. A higher deductible means you pay more out of pocket for emergency repairs. A lower deductible means your insurance company covers more of the cost. When comparing insurance policies, consider not just the premium but the deductible, especially if you live in an area prone to storms.
| Cost Factor | Impact on Reimbursement |
|---|---|
| Tarping invoice amount | Reduces claim settlement by this amount |
| Your deductible | You pay this first; tarping cost may be absorbed |
| Total repair estimate | Tarping cost is part of total loss |
| Policy coverage limits | Claim cannot exceed your policy maximum |
What Qualifies as a Covered Peril
A covered peril is the specific cause of damage that your insurance policy agrees to cover. This is crucial, if the damage isn’t from a covered peril, your insurance won’t pay, regardless of how well-documented it is.
Most homeowners insurance policies cover wind damage, hail damage, and storm damage. These are the most common causes of roof damage requiring emergency tarping. Wind damage includes damage from straight-line winds, tornadoes, and severe storms. Hail damage is typically covered under the standard HO-3 policy, though some insurers require separate hail coverage in high-risk areas.
However, certain causes of damage are explicitly excluded. Water damage from flooding is not covered by standard homeowners insurance, you need a separate flood insurance policy (fema.gov). Damage from poor maintenance, wear and tear, or gradual deterioration is not covered. If your roof was already leaking before the storm, and the storm simply worsened it, your insurer may argue that the pre-existing condition is not covered.
This is where the adjuster’s assessment becomes important. They determine whether the damage is from a covered peril or from an excluded cause. If you believe the adjuster made an error, you can request a second opinion or hire an independent adjuster to review the claim.
Storm damage, wind, hail, or heavy rain combined with wind, is almost always a covered peril. If a storm caused your roof damage and you’ve tarped it to prevent further loss, you have a strong case for reimbursement.
Steps to Take Immediately After Roof Damage
The first few hours after roof damage occurs are critical. Here’s the exact sequence to follow.
Step 1: Ensure safety. Before doing anything else, make sure no one is in immediate danger. If the roof is structurally compromised or debris is falling, evacuate the area. Call emergency services if anyone is injured.
Step 2: Prevent further damage. If it’s safe to do so, move valuables away from the damaged area. Close windows and doors to minimize water intrusion. If water is actively entering the home, place buckets or towels to contain it temporarily. This is mitigation in action, you’re preventing secondary damage.
Step 3: Call your insurance company. Report the damage as soon as possible. Provide a brief description of what happened, when it occurred, and what areas are affected. Ask about the claims process and when an adjuster will visit. Most insurers can schedule an inspection within 24-48 hours.
Step 4: Arrange emergency tarping. Contact a qualified roofing contractor to assess the damage and tarp the roof if necessary. Get a quote and have the work done the same day if possible. Keep the invoice and all documentation. Rescue Roofing offers 24-hour availability for emergency roof damage, including tarping and temporary stabilization.
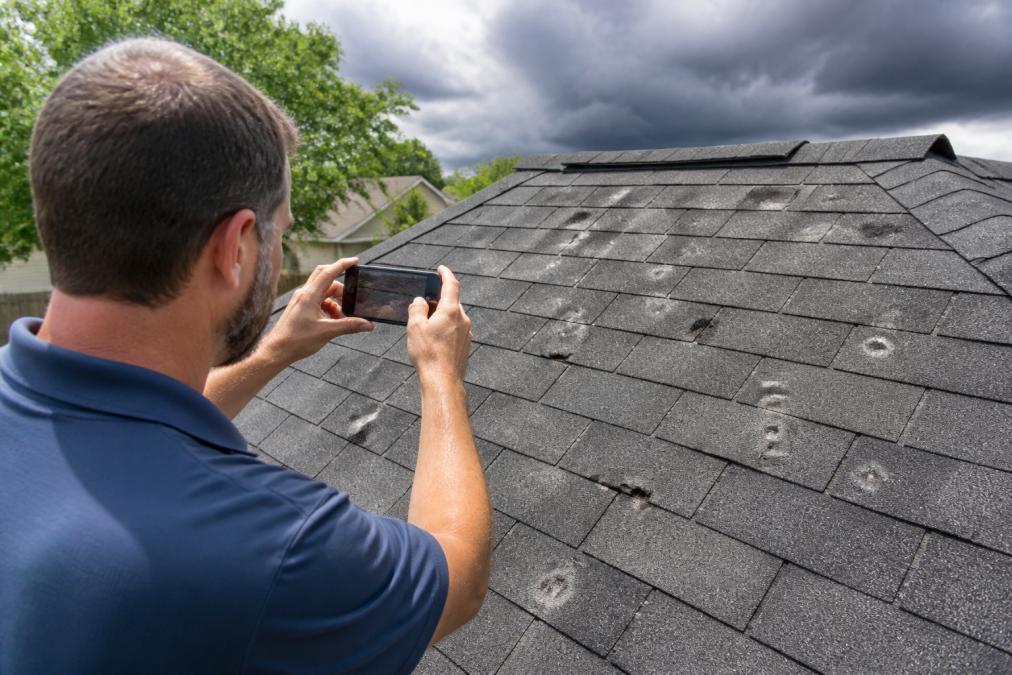
Step 5: Document the damage. Take photographs and video from multiple angles, including wide shots and close-ups. Capture the emergency tarping work. Write down the date, time, and cause of the damage. These records are essential for your claim.
Step 6: Do not make permanent repairs. Wait for the insurance adjuster to inspect the damage before replacing shingles, patching the roof, or making any permanent repairs. Temporary measures like tarping are fine, permanent repairs should wait.
Step 7: Keep all receipts and invoices. File away every document related to the damage and emergency repairs. You’ll need these when submitting your claim.
The timeline matters. Insurance companies expect homeowners to act quickly. Delays in tarping or reporting the damage can be used as evidence that you failed to mitigate damages, potentially reducing your payout.
Homeowners who experience sudden roof damage from storms, hail, or wind. The steps above apply to residential properties with standard homeowners insurance coverage.
Conclusion
Emergency tarping is almost always covered by homeowners insurance when the damage results from a covered peril like wind or hail. The key is understanding your policy’s language around temporary repairs and the duty to mitigate damages, documenting everything thoroughly, and acting quickly.
At Rescue Roofing, we help homeowners navigate this process from start to finish. Our team provides emergency tarping and temporary stabilization, assists with insurance claim documentation, and communicates directly with adjusters to ensure your claim is handled properly. We offer 24-hour availability for storm damage emergencies and can provide accurate aerial quotes that support your insurance claim. When roof damage strikes, having a trusted contractor who understands the insurance process makes all the difference. Contact Rescue Roofing today to discuss your roof damage and learn how we can help protect your home while your claim is being processed.
Frequently Asked Questions
Q: Does homeowners insurance cover emergency roof tarping?
A: Yes, most homeowners insurance policies cover emergency tarping as part of the duty to mitigate damages. Your policy requires you to take reasonable steps to prevent further damage after a covered peril like a storm. Emergency tarping stops water intrusion and protects your home’s structural integrity. However, coverage depends on whether the initial damage was caused by a covered peril. Review your HO-3 policy or contact your insurance agent to confirm your specific coverage.
Q: What documentation do I need when documenting roof damage for insurance?
A: Take photos and videos from multiple angles showing the damage clearly. Include close-ups of affected areas and wide shots showing the overall damage pattern. Capture any water stains, structural damage, or debris. Write down the date and time of the storm. Keep receipts and invoices from any emergency repairs or tarping services. Note the weather conditions and any visible hail, wind, or debris impact. Your adjuster will use this documentation to assess the claim and determine coverage.
Q: How much does emergency roof tarping typically cost, and will insurance reimburse it?
A: Emergency tarping costs vary based on roof size, damage extent, and local contractor rates. Most homeowners insurance policies will reimburse emergency tarping costs as part of the claim settlement, provided the initial damage was caused by a covered peril. The reimbursement applies toward your deductible and claim payout. Always get an invoice from the contractor and submit it with your claim documentation to ensure reimbursement.
Q: What steps should I take immediately after roof damage occurs?
A: First, ensure your safety and that of your family. Document the damage with photos and video before any cleanup. Contact your insurance company within 24-48 hours to report the damage. Take reasonable steps to prevent further damage, such as emergency tarping or water extraction. Get written estimates from licensed contractors for emergency repairs. Avoid making permanent repairs until the adjuster inspects the damage. Keep all receipts and documentation. This immediate action protects your claim and demonstrates compliance with your policy’s mitigation requirements.
This article was written using GrandRanker