


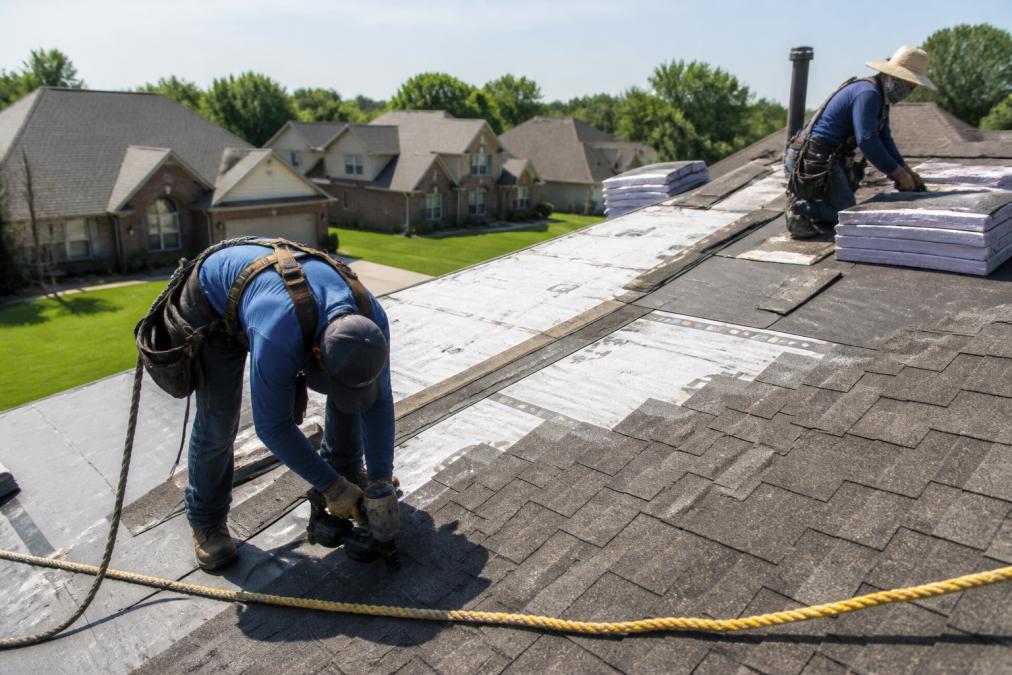

Table of Contents
- The New Roof Installation Process: A Step-by-Step Overview
- Roof Replacement Cost vs Repair: Making the Right Call
- Average Roof Replacement Timeline: What to Expect Day by Day
- How to Prepare for Roof Replacement: A Homeowner’s Checklist
- Managing Noise, Debris, and Pets During Installation
- Permits, Insurance Claims, and Warranty Coverage
- Frequently Asked Questions
Last Updated: September 10, 2026
The New Roof Installation Process: A Step-by-Step Overview
Knowing what to expect during roof installation Tulsa starts with understanding the sequence of work. A roof installation is a structured, multi-phase project, not a single day’s job. We walk every homeowner through the same three phases before a single shingle is nailed down, because surprises are what make roofing stressful.
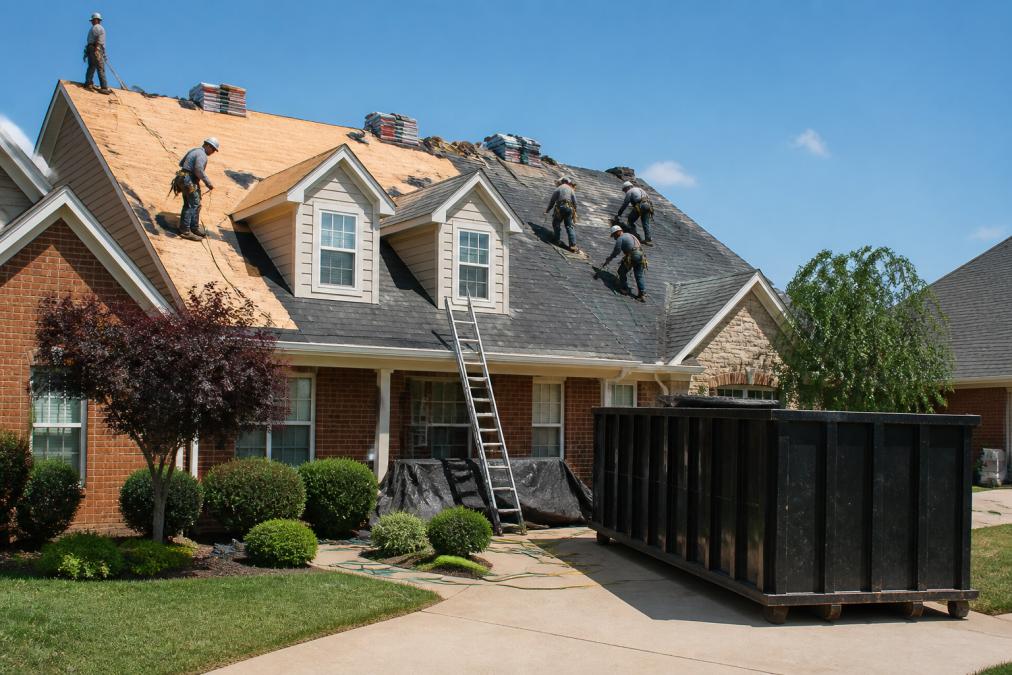
The process moves from inspection to material selection to tear-off and decking. Each phase has its own timeline and its own decisions for you to make.
Step 1: Inspection and Aerial Quote
An accurate quote starts with a thorough inspection, often paired with aerial measurement technology. A contractor assesses your roof’s square footage, pitch, and visible damage before quoting. Aerial measurement tools reduce the need for someone to walk every slope, which speeds up the estimate and lowers the risk of missed measurements. Ask whether the quote accounts for decking repairs, because those are frequently discovered after tear-off begins.
Step 2: Material Selection and Scheduling
Material choice drives both cost and lifespan. Asphalt shingles remain the most common residential roofing material, while metal roofing appeals to homeowners wanting a longer service life. Your contractor should explain how roof pitch, ventilation, and local weather shape the recommendation. Once materials are chosen, scheduling depends on material lead times and weather windows. Most projects are scheduled days to weeks out, not months.
Step 3: Tear-Off and Decking Inspection
Tear-off is when the old roofing materials come off and the decking underneath is exposed. This is the moment hidden damage becomes visible. A contractor inspects the decking for rot, soft spots, or water damage and replaces compromised sections before installing new underlayment. Skipping this step is a common mistake. New shingles over failing decking will not last, no matter how good the shingles are.
Never let a crew install new roofing over damaged decking to save time. The shingles may look fine for a season, but the underlying structural integrity is already compromised, and you will pay for it again within a few years.
Roof Replacement Cost vs Repair: Making the Right Call
The decision between repair and replacement comes down to age, extent of damage, and how much of the roof system is failing. A single missing shingle or a small flashing leak is usually a repair. Widespread granule loss, multiple leaks, or a roof past its expected lifespan points toward replacement.
Here is how to think about the trade-off:
| Situation | Recommended Path | Why |
|---|---|---|
| One isolated leak, roof under 10 years old | Repair | Cheaper, faster, preserves remaining life |
| Storm damage on part of the roof | Repair or partial replacement | Depends on adjuster assessment |
| Roof near end of lifespan with several leaks | Replacement | Repairs become recurring costs |
| Widespread granule loss or curling shingles | Replacement | Material is failing across the surface |
A repair buys time. A replacement resets the clock on the entire roof system, including underlayment, flashing, and drip edge. For homeowners weighing this decision, a professional inspection is the only reliable way to know which side of the line you are on. A professional inspection is the only reliable way to know which side of the line you are on.
[FEMA guidance on roof repair after storm damage(/blog/how-to-file-a-roof-insurance-claim-in-oklahoma-a-tulsa-homeowners-2026-guide/) | fema.gov]
Average Roof Replacement Timeline: What to Expect Day by Day
Most residential roof replacements take one to three days of active work, depending on size, pitch, and weather. Larger or more complex roofs can stretch longer. Here is a realistic day-by-day breakdown that shows not just what happens, but why each phase matters.
Day 1: Setup and Tear-Off
- Early morning: The crew arrives, stages the dumpster in the driveway, sets up ladders and fall-protection anchors, and lays tarps over landscaping and siding below the work area.
- Mid-morning: Tear-off begins. Crews typically work from the ridge down, prying up shingles, underlayment, and old flashing. On a typical single-family home, tear-off runs two to six hours depending on layers.
- Afternoon: Decking is exposed and inspected. Rotted or soft sheathing is marked, cut out, and replaced. This is also when the crew checks for popped nails, sagging between rafters, and prior leak paths around chimneys and vents.
- End of day: If the roof cannot be dried in, the crew should tarp the exposed deck. Ask before work starts whether overnight dry-in is standard practice.
Day 2: Underlayment, Flashing, and Shingle Installation
- Morning: Ice-and-water membrane goes down along eaves and in valleys, then synthetic underlayment covers the field of the roof. Drip edge is nailed along the rakes and eaves, and new flashing is set at chimneys, sidewalls, and vent penetrations.
- Midday: Shingle installation begins at the eaves and works upward in staggered courses. On a standard gable roof, a crew can lay 20 to 40 squares in a day depending on pitch and cuts.
- Afternoon: Valleys, hips, and ridges are finished. Ridge vent and intake venting are installed together so the attic ventilation balance is correct.
Day 3 (If Needed): Completion and Cleanup
- Morning: Remaining slopes, ridge caps, and any punch-list items are completed.
- Midday: A magnetic sweep of the yard, driveway, and planting beds catches stray nails. Gutters are cleared of shingle debris.
- Final walkthrough: The crew lead and homeowner walk the perimeter, confirm the dumpster is scheduled for pickup, and review the workmanship warranty paperwork.
What Actually Stretches the Timeline
Weather is the biggest variable. Rain delays tear-off and shingle installation, so a project scheduled for two days may stretch to four. Wind above roughly 20 mph can also stop shingle work because shingles will not seal and crews cannot safely handle bundles. Ask your contractor how they handle weather delays and whether they protect exposed decking overnight. A crew that leaves decking open in a storm window is a crew that will cost you money.
Other common stretch factors:
- Multiple existing layers: Two or three layers of old shingles can add half a day or more to tear-off.
- Steep pitch or complex geometry: Dormers, turrets, and multiple valleys slow every phase.
- Hidden decking damage: Replacing more than a few sheets of sheathing adds time and cost.
- Material delivery timing: If shingles arrive late, the crew cannot start the dry-in phase on schedule.
Ask your contractor to confirm the project duration in writing before work begins, including a weather-contingency plan. A written timeline gives you a benchmark to hold the crew to and a clear signal if the job is falling behind schedule.
How to Prepare for Roof Replacement: A Homeowner’s Checklist
Preparing for roof replacement is mostly about protecting what is inside your home and clearing the work zone outside. Most of the preparation takes an hour or two the day before.
- Move vehicles out of the driveway and away from the dumpster drop zone
- Clear the attic of items stored directly under the roof deck
- Remove wall hangings and fragile items from walls on the top floor
- Cover furniture and electronics in upper rooms with drop cloths
- Trim tree branches that overhang the roof or driveway
- Secure pets indoors or arrange off-site care
- Note any pre-existing interior cracks or damage for later comparison
- Confirm the contractor’s start time and expected daily schedule
That last item matters more than most homeowners expect. Knowing when the crew arrives and leaves each day lets you plan around the noise and gives you a clear window to inspect progress.
OSHA residential fall protection standards for roofing work
Managing Noise, Debris, and Pets During Installation
Noise and debris are the two things homeowners underestimate most. Tear-off is loud. Hammers, nail guns, and shingle deliveries run from early morning to late afternoon. If you work from home, plan to relocate calls or work from another room during the noisiest hours.
Debris management is the contractor’s job, and a good crew runs a magnetic sweep of the yard and driveway at the end of each day to catch stray nails. Ask about this before work starts. Nails in a driveway are a flat tire waiting to happen, and they are also a hazard for pets and children.
Pets need a plan. The constant noise and unfamiliar people on the roof stress most animals. Boarding a nervous pet for the duration of the project is often the simplest solution. For pets staying home, keep them in a room farthest from the work and close the blinds so they cannot see the crew.
The three things that most often go wrong during a roof installation Tulsa homeowners face are unmanaged noise, stray debris, and stressed pets. All three are preventable with a short conversation before the crew arrives.
Permits, Insurance Claims, and Warranty Coverage
Permits and paperwork are where a good contractor separates from a cheap one. Most municipalities require a building permit for a full roof replacement, and the permit process protects you by requiring an inspection of the finished work. Ask your contractor who pulls the permit and who schedules the inspection. If the answer is “you do,” that is a red flag.
Local Permitting and Code Basics
Roofing permits are issued at the municipal level, and requirements vary from one jurisdiction to the next. In most cities, a full tear-off and replacement requires a permit, while minor repairs below a threshold square footage may not. The permit typically triggers at least one inspection, often a final inspection after the roof is complete, and sometimes a mid-project inspection of the decking and flashing before shingles go on.
A few things to confirm before work starts:
- Who pulls the permit. The licensed contractor should pull it in their name. A permit pulled by the homeowner can shift liability onto you if something goes wrong.
- What the inspection covers. Ask whether the inspector checks decking, flashing, ventilation, and fastening patterns, or only the finished surface.
- Whether the contractor is licensed and insured in your state. Ask for the license number and a certificate of insurance, and verify both.
- Code requirements that affect your project. Modern codes often require specific ice-and-water membrane coverage, drip edge, and attic ventilation. These are not upsells, they are code minimums.
If your contractor cannot answer these questions clearly, that is a sign they do not pull permits regularly, which is a risk to you at resale. Unpermitted roof work can surface during a home inspection and complicate a sale.
Insurance Claims After Storm Damage
Insurance claims follow a different path. If your roof was damaged by a storm, you file a claim, an adjuster assesses the damage, and the insurer issues a scope of work. A contractor experienced with claims can communicate directly with the adjuster, document the damage properly, and reduce the chance of a disputed or underpaid claim. Rescue Roofing assists with insurance claim filing and communicates with insurance companies and adjusters on your behalf.
A few practical notes on claims:
- Document before you repair. Take photos of damage before any temporary repairs, and keep receipts for emergency tarping.
- Understand your deductible. The deductible applies to the claim, and in many states it is illegal for a contractor to waive it.
- Watch for scope gaps. Adjuster scopes sometimes omit items like drip edge, ridge vent, or permit fees. A contractor who reviews the scope line by line can flag missing items before work begins.
- Know your deadlines. Most policies have a time limit for filing storm claims, and some states have separate deadlines for supplemental claims.
Warranty Coverage: Two Parts, Two Sets of Rules
Warranty coverage has two parts: the manufacturer’s warranty on materials and the contractor’s workmanship warranty. Manufacturer warranties are typically prorated and tied to proper installation. Workmanship warranties cover the installation itself and are only as good as the contractor offering them. Get both in writing, and ask what voids them. Poor ventilation or skipped underlayment can void a manufacturer warranty, which is why the installation details matter as much as the shingle brand.
Questions worth asking before you sign:
- How long is the workmanship warranty, and is it transferable if you sell the home?
- Does the manufacturer warranty require registration, and who files it?
- What maintenance is required to keep the warranty valid?
- What is excluded, for example, damage from foot traffic, hail, or improper attic ventilation?
Permits, insurance, and warranties are the paperwork layer of a roof replacement. The contractor who handles all three transparently, pulling the permit, documenting the claim, and putting both warranties in writing, is the one who protects your investment long after the crew leaves.
Oklahoma Insurance Department consumer resources on storm damage claims
Frequently Asked Questions
Should I be home during my roof replacement?
You do not need to be home for the entire installation. Most homeowners stay for the first hour to meet the crew and then leave. If you work from home, plan to be away during the noisiest parts, typically the tear-off and shingle nailing phases. Being present helps if you have questions, but it is not required. Just ensure someone can let the crew access the driveway and yard.
How long does a typical roof replacement take in Tulsa?
Most residential roof replacements in Tulsa are completed in one to three days, depending on square footage, roof pitch, and weather. A simple gable roof might take a single day, while a complex roof with multiple valleys and dormers can take three or more. Your contractor will give you a specific timeline before work begins, and delays from rain are common in spring.
What is the 25% rule in roofing and how does it apply to my insurance claim?
The 25% rule is a common insurance guideline: if storm damage affects more than 25% of your roof’s surface, many insurers will pay to replace the entire roof rather than patch it. This threshold varies by policy and adjuster. Rescue Roofing can help document the damage and communicate with your insurance company to ensure you get the coverage you are entitled to.
How do I know there isn’t hidden damage under my roof that will cost extra?
Hidden damage is a legitimate concern. Before installation, a thorough inspection and aerial quote help identify soft spots or water damage. During tear-off, if the decking is compromised, your contractor should show you photos and provide a written change order before proceeding. Rescue Roofing documents all findings and discusses options with you before any additional work begins.