



Table of Contents
- Emergency Roof Damage Assessment Checklist
- Emergency Roof Tarping: Stabilize and Protect
- Roof Insurance Claim Process: Document and File
- Temporary Repairs vs. Permanent Fixes: What You Need to Know
- Night-Time Emergency Protocols for Roof Damage
- Safety Gear Checklist for Emergency Roof Damage
- Conclusion
- Frequently Asked Questions
Last Updated: September 16, 2026
Emergency Roof Damage Assessment Checklist
Emergency roof damage is any sudden compromise to your roof’s structure or waterproofing, from storm winds, hail, fallen limbs, or punctures, that exposes your home to active water intrusion. Knowing how to handle emergency roof damage starts with a calm, safe assessment before you touch anything.
The people who document first and climb second get the smoothest insurance outcomes.
Here’s what matters most: your safety and your documentation matter more than any temporary fix. Never walk a storm-damaged roof in rain, wind, or darkness.
Work through this assessment checklist from the ground up:
- Scan the roofline with binoculars for missing shingles, lifted flashing, or sagging sections
- Check the attic for daylight, dark water stains, or dripping
- Look for granule buildup in gutters and downspouts
- Note ceiling stains, bubbling paint, or musty odors inside
- Photograph everything before moving anything
The FEMA guide to post-storm safety recommends treating any sagging roof deck as structurally unsafe until a professional inspects it.
| Warning Sign | What It Means | Immediate Action |
|---|---|---|
| Missing shingles | Exposed underlayment | Tarp that section |
| Attic daylight | Puncture or gap | Document, then cover |
| Ceiling stains | Active leak | Move valuables, bucket |
| Sagging deck | Structural damage | Evacuate that area, call a pro |
Emergency Roof Tarping: Stabilize and Protect
Emergency roof tarping is the practice of covering a damaged roof section with a waterproof tarp to stop active water intrusion until permanent repairs are possible. It is a temporary patch, not a fix.
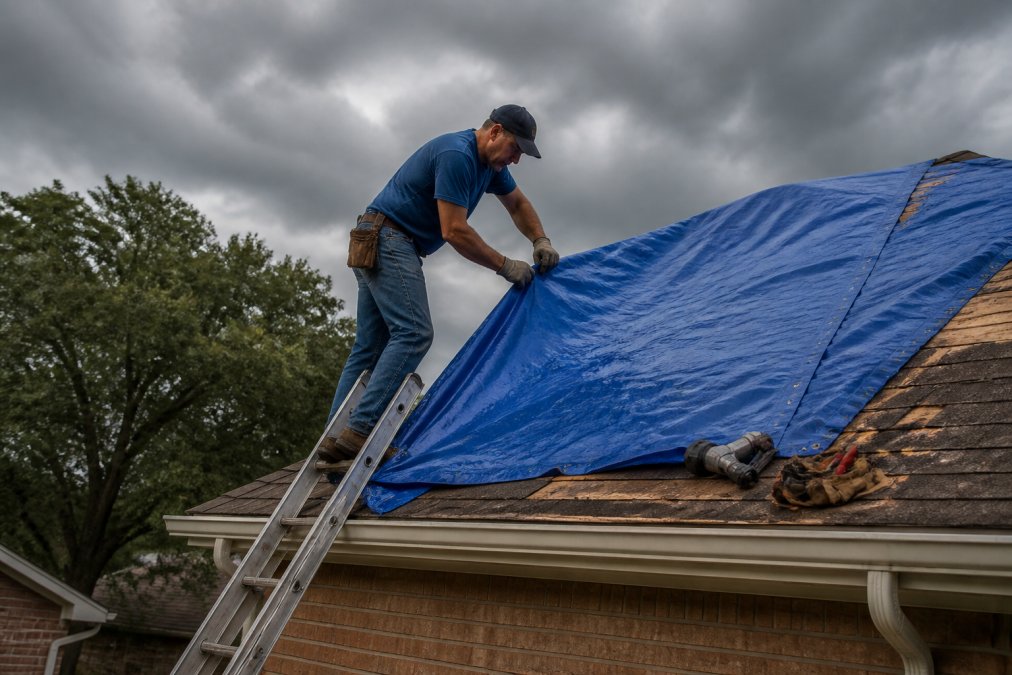
Done correctly, tarping prevents moisture damage from spreading into insulation, drywall, and framing. Done wrong, it can trap water, void warranties, or create a wind sail that tears off and causes more property damage.
Follow these steps:
- Choose a polyethylene tarp with reinforced grommets, at least 6 mil thick
- Extend the tarp at least 4 feet past the damaged area on all sides
- Run the tarp over the ridge and down the slope so water sheds naturally
- Secure with cap nails or 1×4 lumber strips, never staples alone
- Anchor edges so wind cannot lift the material
Never tarp over an active electrical hazard, a downed power line, or a sagging deck. If any of these are present, stay off the roof entirely and call a roofing professional.
Roof Insurance Claim Process: Document and File
The roof insurance claim process is the sequence of documentation, filing, and adjuster review that determines how much of your repair your policy covers. Most homeowners lose money not because their claim is denied, but because their documentation is thin and their communication with the adjuster is passive.
Start the paper trail the same day damage occurs.
- Photograph every angle of the damage, plus wide shots showing the whole roof
- Keep receipts for tarps, materials, and any emergency mitigation
- Write a dated log of when damage happened and what you did
- Request a written inspection report from your roofing contractor
A common mistake is filing before you have professional documentation. Insurance adjusters work from evidence. The Oklahoma Insurance Department consumer resources advises homeowners to review their policy’s storm damage provisions before filing.
How to Talk to Your Adjuster (The Part Most Guides Skip)
Once your claim is filed, the adjuster’s scope-of-loss report, not your contractor’s estimate, becomes the baseline the insurer pays against. The gap between those two documents is where most underpayments happen. You can close that gap with a few deliberate moves:
- Be present for the inspection. Walk the roof or attic with the adjuster if it’s safe. Point out damage in person rather than emailing photos later.
- Ask for the scope of loss in writing. You are entitled to the itemized report showing what the adjuster measured and priced. Read it line by line.
- Compare it to your contractor’s line-item estimate. Look for missing line items, drip edge, ridge cap, underlayment, ice-and-water shield, flashing, decking, permits, and disposal are the ones most often omitted.
- Request a re-inspection in writing. If the scope is short, submit a written supplement with photos and code citations rather than arguing verbally.
- Cite local building code. Many policies pay for code-required upgrades (such as bringing an older roof up to current code) that adjusters don’t automatically include. Ask your contractor for the relevant code section.
- Keep every communication in writing. A dated email trail beats a phone call you can’t prove.
Ask your contractor to communicate directly with the adjuster and to submit a written supplement rather than a verbal counter. Rescue Roofing handles adjuster coordination and supplement documentation as part of our claims assistance.
What Adjusters Look For
Adjusters are trained to separate storm damage from pre-existing wear, so your evidence needs to make that distinction obvious. Useful items include:
- Date-stamped photos of the damage before any temporary repair
- A weather report or storm date tying the damage to a covered event
- Manufacturer or contractor notes distinguishing hail bruising from age-related granule loss
- Receipts for emergency mitigation, which many policies reimburse separately
If the Claim Is Underpaid or Denied
You have options short of hiring an attorney. Most policies include an appraisal clause that lets you and the insurer each hire an independent appraiser when you disagree on the amount of loss. You can also file a complaint with your state’s department of insurance, which regulates how carriers handle claims in your state. Both routes are free or low-cost and are routinely used when a supplement stalls.
Never sign a final proof-of-loss or accept a settlement check until your contractor has reviewed the scope against the actual repair cost. Once you cash it, you may be accepting that amount as full payment.
The takeaway: filing is the easy part. The money is won or lost in the documentation and the back-and-forth that follows.
Temporary Repairs vs. Permanent Fixes: What You Need to Know
Temporary repairs stop water intrusion. Permanent fixes restore your roof’s structural integrity and waterproofing. Confusing the two is how homeowners end up with a roof that fails again within a season, or with a denied claim.
A tarp, a tube of roof cement, or a patch over a puncture buys you days to weeks. It does not restore shingle damage, replace compromised flashing, or repair damaged underlayment.
| Repair Type | Lifespan | Best For | Risk If Delayed |
|---|---|---|---|
| Tarping | Days to weeks | Active leak, storm incoming | Rot, mold growth |
| Sealant patch | Weeks to months | Small puncture | Hidden moisture spread |
| Shingle repair | Years | Isolated damage | Progressive leak |
| Full replacement | 20+ years | Widespread damage | Structural failure |
The Consequences Most Guides Don’t Mention
A temporary repair isn’t just a stopgap, it carries legal, warranty, and insurance weight that can cost you more than the leak itself.
Manufacturer warranty. Most asphalt shingle warranties require installation by a licensed or certified contractor and void coverage if the roof is altered by unqualified work. Patching a hail-damaged field of shingles yourself can void the warranty on the entire slope, not just the patched area.
Building code. Temporary repairs are generally permitted as emergency measures, but many jurisdictions require a permit for permanent roof work and inspect the final installation.
How to Tell Which One You Need
Use this rule of thumb:
- Temporary: active water is entering, a storm is forecast, or you cannot safely access the roof. Stop the water and document.
- Permanent: the leak is stopped, the weather has cleared, and a professional has inspected the full extent of the damage. This is when shingles, flashing, and underlayment get replaced.
The safest sequence is always the same: contain the water, document everything, then let a licensed professional make the permanent repair. Temporary fixes protect your home; permanent fixes protect your warranty, your code compliance, and your claim.
Night-Time Emergency Protocols for Roof Damage
Do these three things:
- Move furniture, electronics, and valuables away from leak areas
- Place buckets and towels to catch water and reduce moisture damage
- Photograph everything with your phone’s flash for your documentation
Never climb a wet, dark roof. Falls, not roof damage, are the leading cause of storm-related homeowner injuries. Containment at night, repair at first light.
Safety Gear Checklist for Emergency Roof Damage
Safety gear is the difference between a handled emergency and a hospital visit.
Improvised anchors, ladder stands on soft ground, and working alone are the three most common causes of serious injury during roof emergencies. Wait for a professional.
Conclusion
The gap between a handled emergency and a costly disaster usually comes down to two things: what you documented and who you called.
Frequently Asked Questions
How do I safely inspect my roof for damage after a storm?
Start by checking for signs of damage from the ground using binoculars. Look for missing shingles, granule loss, and sagging areas. If you need to get on the roof, ensure the ladder is stable and the surface is dry. Wear non-slip shoes and avoid stepping on damaged areas. For a thorough assessment, use our roof damage assessment checklist and consider a professional inspection to avoid injury and hidden damage.
What is the 25% rule for roofing insurance claims?
The 25% rule refers to a common insurance policy provision that states if storm damage affects 25% or more of your roof’s surface, the insurer may require replacement of the entire roof rather than just repairing the damaged sections. This rule varies by policy and state, so review your specific coverage. Document all damage thoroughly to support your claim.
What should I do immediately after discovering storm roof damage?
First, ensure everyone’s safety and avoid going onto the roof. Check for water intrusion inside your home and move valuables away from leaks. Then, document the damage with photos and videos. Contact a professional roofer for emergency tarping to prevent further water intrusion. Finally, call your insurance company to start the roof insurance claim process.
How can I perform a temporary emergency roof repair?
For temporary repairs, use waterproof materials like tarps or plastic sheeting to cover damaged areas. Secure the tarp with nails or screws, ensuring it overlaps damaged sections and slopes downward for drainage. Avoid walking on wet or damaged areas. This is a short-term fix; schedule a permanent repair with a roofing professional as soon as possible.