



Table of Contents
- Step 1: Assess Safety Before You Touch Anything
- Step 2: Contain the Water and Protect Your Interior
- Step 3: Locate the Leak Source with Roof Leak Detection Tools
- Step 4: How to Tarp a Roof for Temporary Protection
- Step 5: Apply Material-Specific Emergency Patches
- Step 6: Document the Damage for Your Insurance Claim
- Step 7: Understand Emergency Roof Repair Cost Factors
- Step 8: Know When to Call a Roofing Professional
- Frequently Asked Questions
Last Updated: September 9, 2026
Step 1: Assess Safety Before You Touch Anything
Emergency roof leak repair begins with a hard truth: the water inside is rarely the most dangerous problem. Wet ceilings, slick shingles, and hidden structural damage turn a simple fix into a fall risk in seconds. Before you grab a bucket or climb a ladder, stop and evaluate the conditions around your home.
Your first priority is protecting people, not property. If water is pooling near electrical outlets, light fixtures, or your breaker panel, shut off power to the affected rooms immediately. Move furniture and electronics out of the path of the drip, then place a sturdy container under the leak to catch the water.
Check the weather before considering any roof access. Do not attempt to reach the roof during active rain, high winds, or when lightning is within range. Wet asphalt shingles are dangerously slick, and a wet roof deck offers little traction. According to OSHA guidance on fall protection in construction, falls are a leading cause of injury in roofing work, and residential homeowners face the same physics as professionals.
Never walk on a roof that is wet, steep, or covered in debris. A fall from even a single-story roof can cause serious injury. If you have any doubt about your footing or the roof’s structural integrity, wait for a professional.
Step 2: Contain the Water and Protect Your Interior
Once you have confirmed the immediate area is safe, your goal shifts to limiting water intrusion while you prepare a more permanent solution. The faster you act, the less moisture damage your ceilings, walls, and flooring will absorb.
Start by clearing the area beneath the leak. Remove valuables, drapes, and upholstered furniture. If the ceiling is bulging or sagging from trapped water, puncture it slightly with a screwdriver or awl to let the water drain into a bucket rather than allowing the ceiling to collapse under the added weight. This ceiling pressure relief step prevents a much larger mess later.
Place plastic sheeting over furniture and floors that cannot be moved. Use towels or a wet-dry vacuum to remove standing water promptly. Quick moisture mitigation reduces the risk of mold growth and makes the eventual water damage restoration process far simpler for any contractor you call (the EPA).
Keep a dedicated emergency repair kit in your garage. Stock it with a roll of polyethylene sheeting, a few 2×4 lumber boards, roofing nails, a hammer, roof sealant, and a utility knife. When a storm hits, you will not waste time hunting for tools while water pours in.
Step 3: Locate the Leak Source with Roof Leak Detection Tools
Water rarely enters exactly where it appears inside your home. It travels along roof decking, insulation, and framing before dripping down, which means the visible stain is often several feet from the actual roof puncture.
Begin your roof leak detection in the attic. Bring a flashlight and look for water trails, dark staining, or light shining through the roof sheathing. Pay close attention to areas around flashing, vents, chimneys, and valleys where different roof planes meet. These junctions are the most common failure points for shingle displacement and deteriorated seals.
If your attic has no visible signs, check the roof exterior from the ground with binoculars. Look for missing shingles, lifted edges, or damage near roof penetrations. A common mistake is assuming the leak source sits directly above the stain; in practice, water can run along a rafter for several feet before dripping. Trace the highest point of any water stain to narrow your search.
Step 4: How to Tarp a Roof for Temporary Protection
Emergency tarping is the single most effective temporary fix you can apply yourself. A properly secured tarp keeps water out until a roofing professional can complete permanent repairs. This method works best when the roof pitch is moderate and the damaged area is accessible from a ladder.
Measure the damaged section and cut your polyethylene tarp so it extends at least 4 feet beyond the leak on all sides. Drape the tarp over the roof ridge when possible, so water sheds over the top rather than running under the edges. Secure the tarp by laying 2×4 boards along its edges and nailing through both the board and tarp into the roof deck. Space nails every 12 to 18 inches (fema.gov).
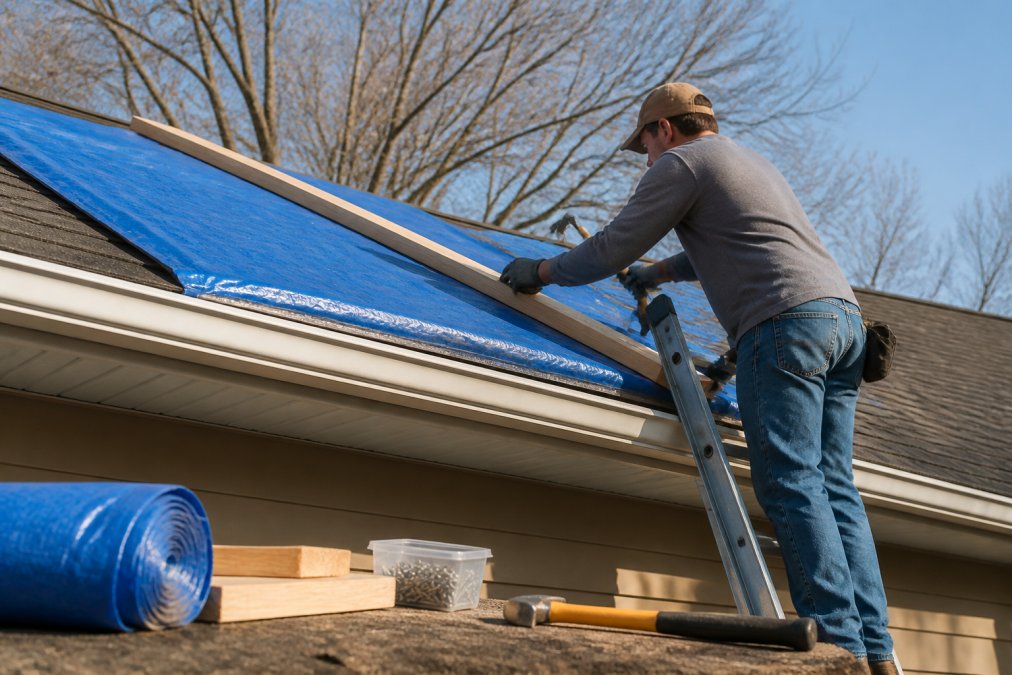
Do not nail the tarp flat to the roof surface. The lumber creates a raised edge that prevents water pooling and gives the nails better holding power. Overlap multiple tarps by at least 12 inches if your damaged area is large, with the upper tarp overlapping the lower one so water flows over the seams.
If your roof has a steep pitch, is two stories or higher, or shows signs of structural damage, skip the DIY tarp job. Improper ladder placement and unstable footing cause more injuries each year than the storms that create the leaks.
Step 5: Apply Material-Specific Emergency Patches
A tarp handles large damaged areas, but smaller leaks often respond better to targeted patches. The right approach depends entirely on your roofing material, and using the wrong product can worsen the problem.
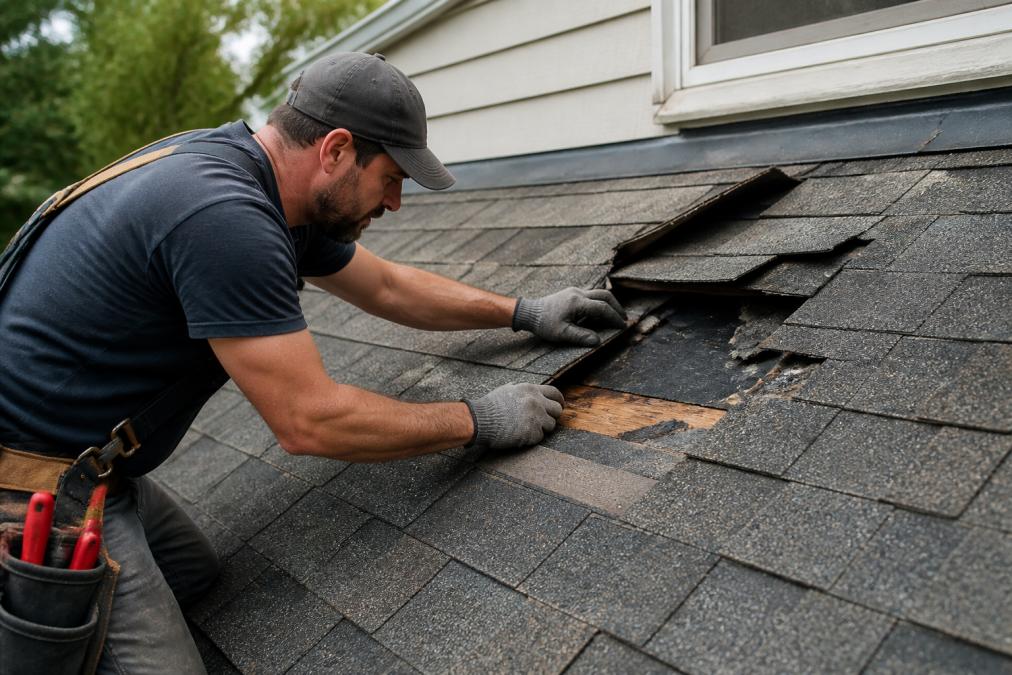
For asphalt shingle roofs, lift the damaged shingle and apply a generous bead of roof sealant or caulking beneath it. Press the shingle back down and weight it until the sealant sets. For a punctured shingle, cut a patch from a spare shingle, apply sealant to the back, and slide it under the damaged area.
For flat roofs common on commercial buildings, use a roofing membrane patch kit designed for your specific surface. Clean the area of debris, apply the primer, and press the membrane patch firmly into place. Metal roofs with popped fasteners or seam gaps respond well to a butyl sealant tape pressed along the affected joint.
A temporary patch buys you time, not a permanent solution. Even a successful patch should be inspected by a roofing professional within a few weeks to confirm no hidden moisture damage developed beneath the surface.
Step 6: Document the Damage for Your Insurance Claim
Thorough property damage documentation is the difference between a smooth insurance claim and a frustrating battle with your adjuster. Your documentation provides the evidence your insurer needs to approve coverage for both the emergency fix and the permanent roof leak repair.
Photograph and video everything before you make any temporary repairs. Capture the water stain on your ceiling, the wet insulation, the damaged shingles, and the tarp installation itself. Take wide shots that show the overall roof condition and close-ups that reveal specific damage. Note the date and time of the storm that caused the leak if you know it.
Keep every receipt related to your emergency response, including materials for your tarp, sealant, and any equipment you purchased. Many policies reimburse reasonable emergency expenses. When you file your claim, present your documentation to the insurance adjuster and explain exactly what damage you observed and what steps you took to prevent further water intrusion.
Most homeowners do not realize that temporary repairs are typically covered under their policy. Documenting your mitigation efforts shows the insurer you acted responsibly to prevent additional damage, which strengthens your claim.
Step 7: Understand Emergency Roof Repair Cost Factors
Emergency roof repair cost varies widely based on the extent of the damage, the materials involved, and the urgency of the response. A small patch on an asphalt roof costs far less than repairing extensive storm damage on a steep or complex roof system.
Several factors drive the final number: the size of the damaged area, the type of roofing material, the roof’s pitch and accessibility, and whether hidden moisture damage requires additional work. Labor rates also rise for after-hours or weekend emergency calls, which is why acting quickly during business hours can reduce your overall expense.
Timing matters as much as the damage itself. A small leak that goes unaddressed for weeks can rot decking, soak insulation, and damage interior ceilings, turning a modest repair into a major project. Investing in a timely repair now almost always costs less than waiting for the damage to spread.
Step 8: Know When to Call a Roofing Professional
Some situations demand professional expertise, and recognizing that boundary protects both your safety and your home. If the leak covers a large area, if the roof structure feels soft or spongy underfoot, or if the damage spans multiple roof planes, stop your DIY efforts and call a contractor.
Professional roofers bring equipment and experience that homeowners simply do not have. They can identify hidden damage beneath the surface, source matching materials, and complete repairs that meet manufacturer warranty requirements. A licensed roofing contractor also provides the documentation insurers expect for larger claims.
For homeowners in Tulsa facing storm damage or aging roofs, Rescue Roofing offers 24-hour availability and assistance with insurance claim filing. Their team communicates directly with insurance companies and adjusters, so you are not left navigating the claims process alone. Accurate aerial quotes provide a reliable picture of your roof’s condition before any work begins, and financing options are available when repairs are no longer sufficient.
Call a professional immediately if water is leaking near electrical systems, the leak has persisted for more than a few hours, or your roof shows widespread shingle damage. These situations carry risks that outweigh any benefit of continued DIY effort.
A roof leak tests your patience, your safety judgment, and your budget all at once. Acting quickly to contain water and protect your interior prevents most of the long-term damage, while honest documentation keeps your insurance claim moving forward. When the job exceeds your comfort zone or your ladder’s reach, a professional roof leak repair team makes the difference between a lasting fix and a recurring problem. Get started with Rescue Roofing and let our experienced professionals handle the repairs and the insurance paperwork.
Frequently Asked Questions
What is the best temporary fix for a leaking roof?
For most emergencies, a heavy-duty polyethylene tarp is the most reliable temporary fix. Secure it over the leak area and roof ridge with 2×4 lumber and roofing nails. For small punctures or flashing gaps, roofing sealant or roof cement applied to a dry surface can hold for a short period. Avoid permanent-looking fixes like caulking large areas, as this can complicate professional repairs. Always document your temporary fix with photos for your insurance claim.
What should I do if my roof is leaking during a heavy storm?
First, move valuables and furniture away from the leak. Place a bucket to catch water and use a screwdriver to poke a small hole in any sagging ceiling to release trapped water pressure. Do not go on the roof during a storm, as wet surfaces and wind create dangerous conditions. Your immediate priority is containing water intrusion indoors. Once the storm passes, safely inspect the attic to find the leak source.
How do I safely locate the source of a roof leak?
Start in the attic, not on the roof. Use a flashlight to look for water stains, wet insulation, or light shining through the roof deck. Water often travels down rafters before dripping, so the actual entry point may be higher than the visible drip. Common spots include damaged flashing around vents and chimneys, and displaced shingles. Mark the area with chalk, then measure its location from the attic access to help identify the spot on the roof surface.
When should I call a professional for emergency roof repair?
Call a professional immediately if the leak is large, water is near electrical fixtures, or you cannot safely access the roof due to its pitch, height, or condition. A leak that has saturated a large section of ceiling or insulation also requires professional assessment for structural integrity. Attempting complex repairs without the right safety equipment and training risks injury and further damage. A roofing contractor can also help you document the damage correctly for your insurance claim.