


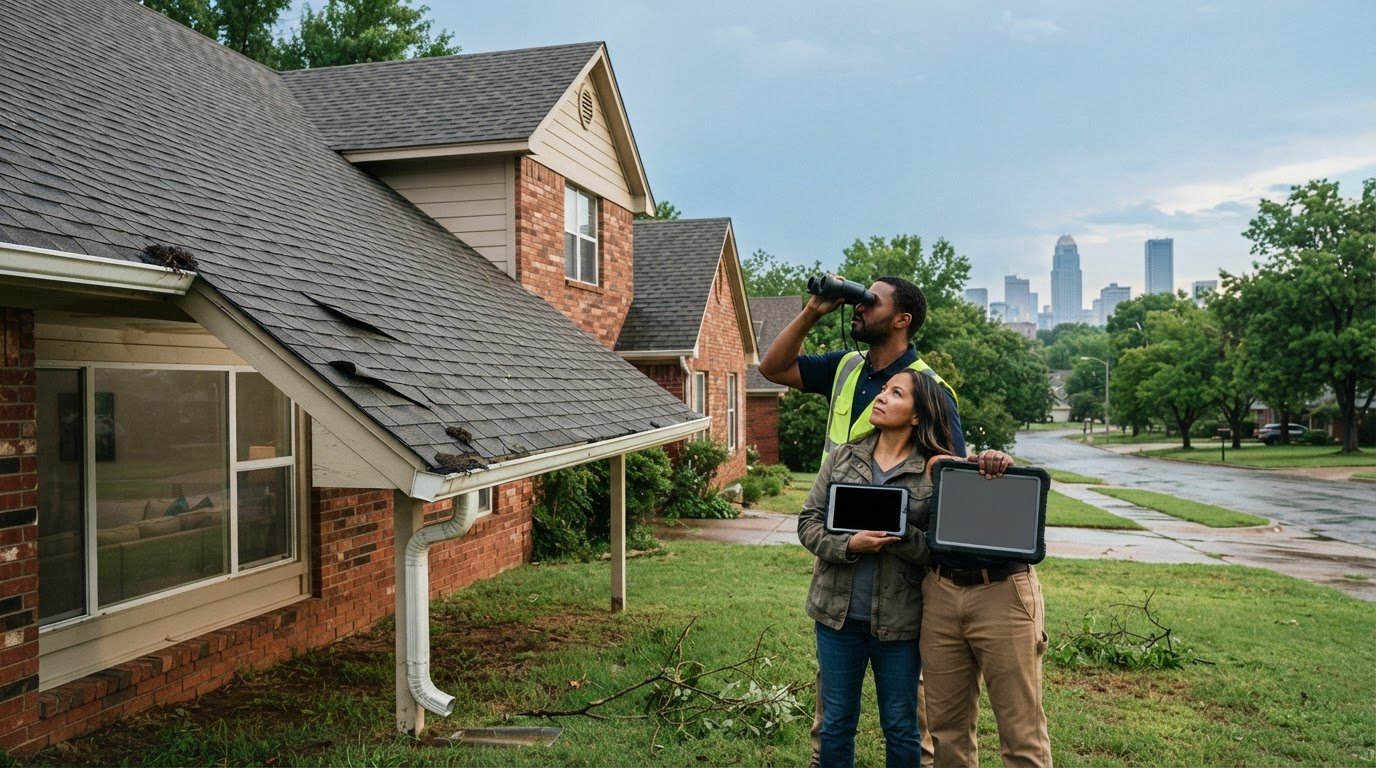

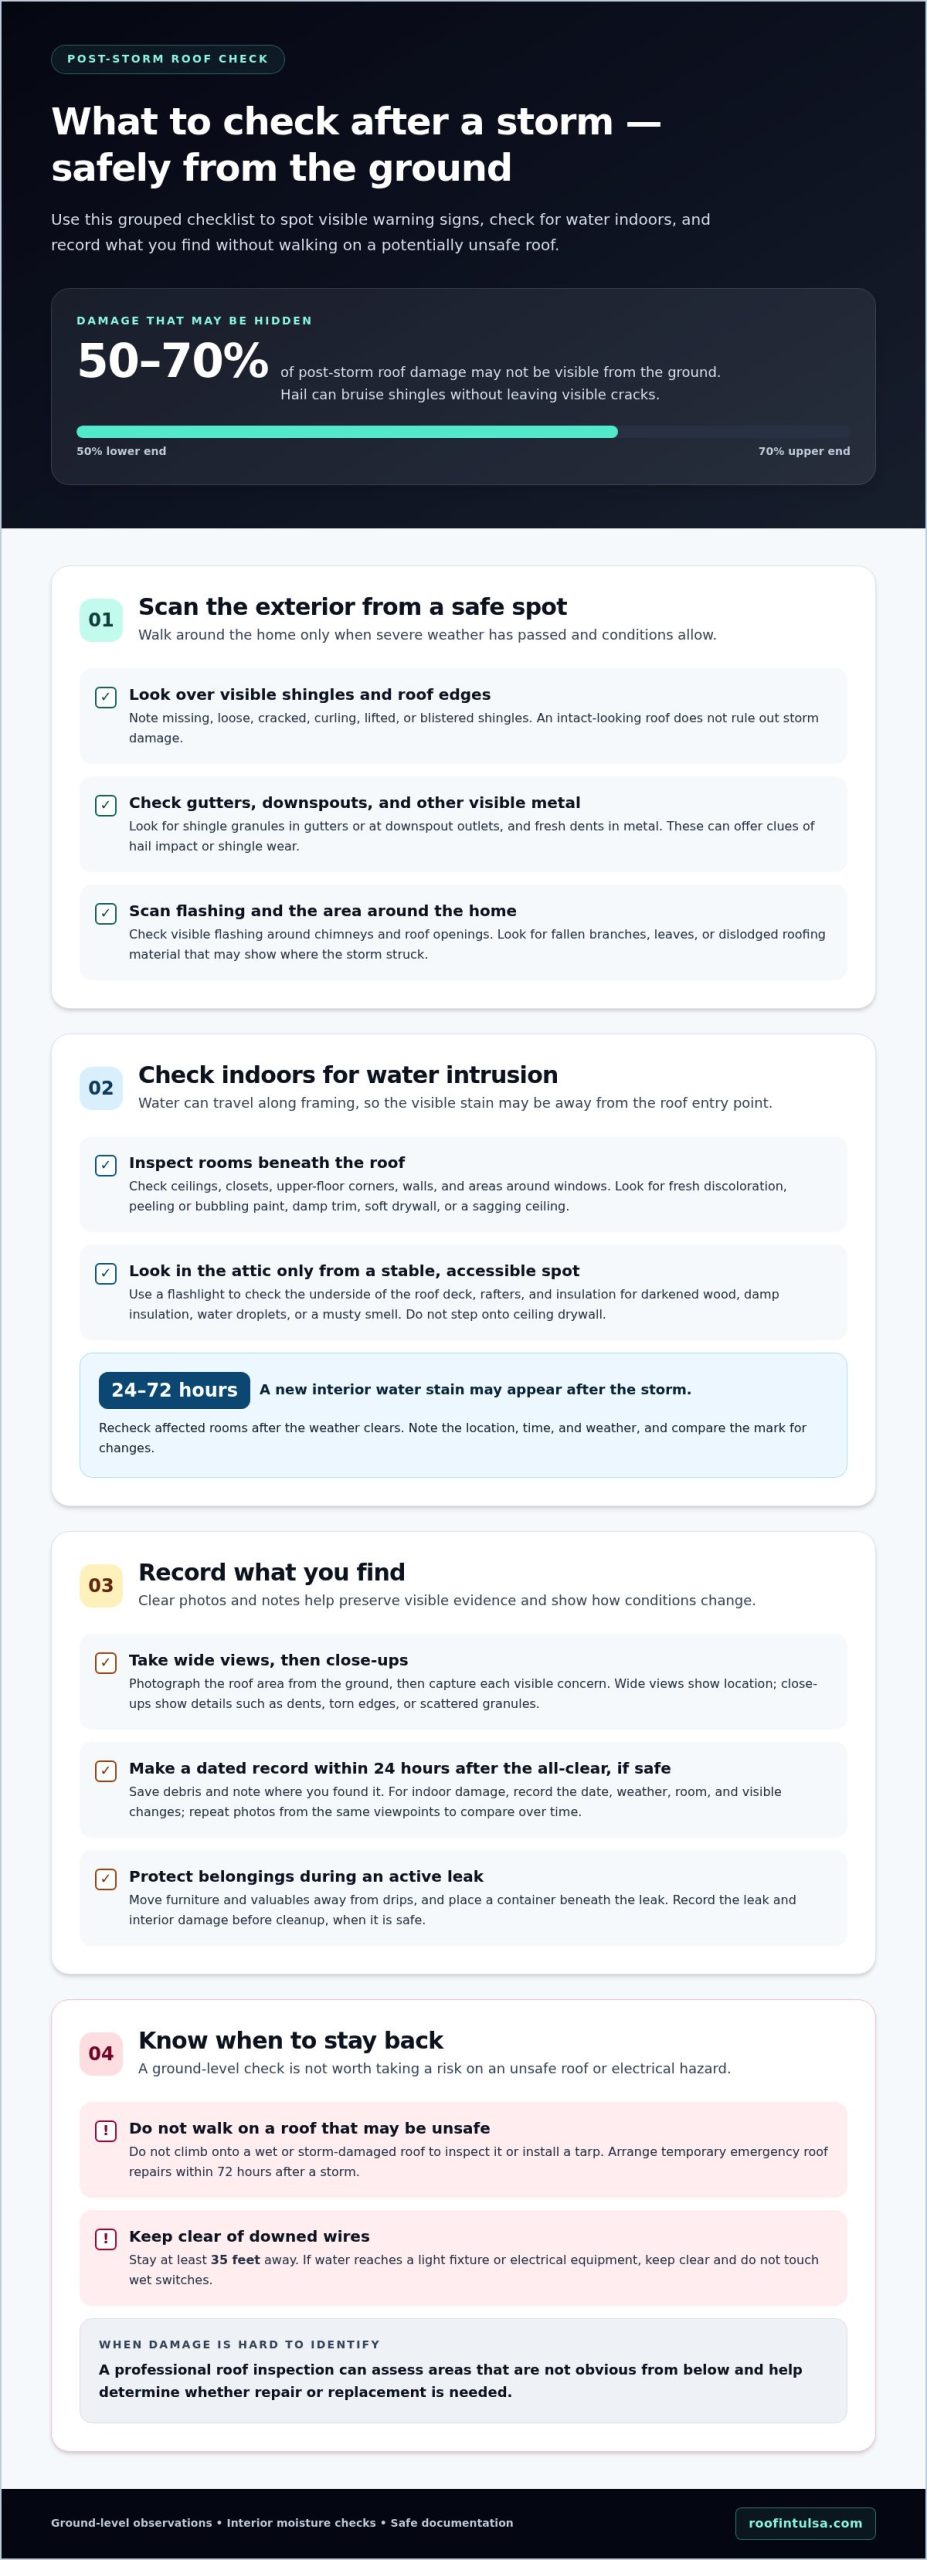
As much as 50-70% of post-storm roof damage may not be visible from the ground. A post-storm roof inspection checklist helps you look for visible warning signs without taking unnecessary risks on a damaged roof.
It’s natural to check the shingles first, but storm damage can also appear around flashing, gutters, ceilings, walls, and in the attic. If the roof looks unsafe, climbing up for a closer look can make a stressful situation more dangerous.
This post-storm roof inspection checklist explains what to look for from the ground, how to spot signs of an interior leak, and when it’s safer to stay off the roof. It also covers documenting visible damage and recognizing when a professional inspection can help identify problems that aren’t obvious from below.
Key Takeaways
- Look for shingle granules in gutters and dents in metal downspouts or gutters, which can offer clues that hail affected the roof.
- Check ceilings, walls, and the attic for moisture; new interior water stains may appear 24-72 hours after a storm.
- Stay at least 35 feet from downed wires, and don’t walk on a roof that may be unsafe.
- Use a professional roof inspection to assess damage that’s hard to identify yourself and determine whether repair or replacement is needed.
How much storm damage is hidden from ground level?
As much as 50-70% of post-storm roof damage may be invisible from the ground. Hail can bruise shingles without leaving cracks you can see, so an intact-looking roof doesn’t rule out damage.
What should homeowners check after a storm? From a safe spot on the ground, look for missing, loose, cracked, curling, or blistered shingles, damaged flashing, and fallen branches or roofing material. It is also important to inspect transitions where patio covers or screen rooms attach to the house; exterior specialists like North Florida Screen Enclosures advise checking these tie-in points for uplift or separated fasteners. These signs may point to weakened areas or water entry.
What is the deadline for filing a storm roof damage insurance claim by state? Deadlines vary by state and policy, so there is no single deadline for every homeowner. Review your policy’s claim-notification instructions and record when the damage occurred.
To reduce the risk of a roofing contractor scam, have a local roofer inspect and document storm damage before signing an estimate or contract. Keep your own dated photos and notes so you can compare them with the inspection record.
- Look for shingle granules collecting in gutters and at downspout outlets. Granule loss can indicate storm impact or shingle wear, even when the roof surface is difficult to see. Exterior maintenance professionals such as So Clean Home Service often point out that checking gutters after severe weather is one of the most effective ways to identify shingle deterioration and buildup.
- Inspect metal gutters, downspouts, and other visible metal surfaces for fresh dents. Dents can help confirm hail impact near the roof, though they don’t show every damaged area.
- Check visible roof edges for missing or lifted shingles, and scan flashing around chimneys and roof openings. These areas can expose the roof to water entry when damaged.
- Look for branches, leaves, and dislodged roofing material around the home. Debris can show where the storm struck and may help you identify areas needing closer inspection.
- Photograph the whole roof area from the ground, then take close shots of each visible concern. Wide views show location; close-ups preserve details such as dents, torn edges, or scattered granules.
- Document roof conditions within 24 hours after the all-clear, if it’s safe to do so. Save collected debris and note where you found it, since its location can help explain the damage pattern.
Checking ceilings, walls, and attic for leaks
Water can travel along roof framing before reaching a ceiling, so a stain may appear away from the entry point. Check every room beneath the roof, including closets and upper-floor corners. Look for fresh discoloration, peeling paint, damp drywall, or a sagging ceiling. A new mark after a storm needs attention, even if the roof looks intact from outside.
Inspect the attic from a stable, accessible spot, and don’t step onto ceiling drywall. Use a flashlight to examine the underside of the roof deck, rafters, and insulation. Darkened wood, damp insulation, water droplets, or a musty smell may indicate moisture. Follow visible marks upward, but remember that water can travel along rafters before dripping.
- Check ceilings below roof valleys and around skylights. These areas can help you connect a stain with a roof opening or joint.
- Inspect walls around windows and exterior corners. Damp patches or bubbling paint can reveal water moving behind the surface.
- Look for wet insulation and water trails in the attic. Photograph the location and nearby framing to record where moisture appears.
- Note the time and weather when you find a new stain. Interior water staining may appear 24-72 hours after a storm, so recheck affected rooms.
- Move furniture and valuables away from active drips, then place a container beneath the leak. This limits damage to belongings while you arrange help.
For an active leak, don’t climb onto a wet or storm-damaged roof to install a tarp. Temporary emergency roof repairs should be arranged within 72 hours after a storm. If water reaches a light fixture or electrical equipment, keep clear of the area and avoid touching wet switches. Record the leak and any interior damage before cleanup, when it’s safe. These notes can help explain how the damage changed over time.
Interior signs of water intrusion
New water stains or discoloration on ceilings and walls after a storm can indicate water is entering the home. Fresh marks may appear 24-72 hours after the storm, so inspect rooms again after the weather clears. Compare suspicious areas with older paint or photos to distinguish new evidence from existing marks.
Look for more than brown rings on the ceiling. Peeling paint, bubbling drywall, damp trim, and lifted wallpaper can also signal moisture. Check corners, ceiling edges, and walls beneath rooflines. A stain may appear some distance from the roof opening because water can travel along framing before becoming visible indoors.
- Note the location and shape of each mark. A narrow streak near a ceiling corner may help trace the direction of water movement.
- Check for changes in texture around the stain. Soft, swollen, or crumbling drywall needs attention because moisture may have reached the material.
- Look for water near windows, light fixtures, and vents. These points help you map where moisture appears, but don’t touch wet electrical fittings.
- Record whether the mark grows or changes after rainfall. A fresh edge or spreading discoloration can show that water is still entering.
Keep a simple record for each affected room. Note the date, weather, location, and visible changes. Take a room-wide photo to show where the mark is, then a close-up capturing its color and edges. Use the same viewpoints during later checks to make changes easier to compare and give an inspector a clear timeline.
Note related signs too, such as a damp smell or wet flooring beneath a stain. Move belongings away from affected areas and place a container under active drips. If water reaches an electrical fixture, keep clear and don’t operate nearby switches. Interior evidence can help connect roof damage to its effects indoors, even when you can’t see the entry point from the room.
Safe post-storm inspection practices
Start only after severe weather has passed and conditions allow a safe walkthrough. Complete it within 24 hours once conditions allow, but keep the inspection at ground level. Look from several sides of the home, using binoculars if available, rather than climbing for a closer view. Use a post-storm roof inspection checklist to keep your observations organized.
- Stay at least 35 feet from any downed wire. Treat fallen wires as dangerous, and don’t approach them to inspect nearby roof damage.
- Check the ground for unstable branches, loose debris, and damaged outdoor structures. These hazards can make walking around the home unsafe.
- Scan roof edges and visible surfaces from the ground. If shingles are missing or sections appear sagging, stay off the roof because it may not support your weight safely.
- Use a flashlight indoors to check for active drips, ceiling stains, and wet areas. Don’t touch wet light fixtures or electrical equipment.
- Take photographs from a stable position and write down what you can see. A dated record helps distinguish storm-related changes from older damage.
Don’t climb a ladder in wind or rain, or on unstable ground. A wet roof, loose shingles, or damaged decking can turn a closer look into a fall hazard. Visible damage is a clear reason to stay off the roof, and larger repairs require professional expertise. If you can’t inspect comfortably from the ground, arrange a professional inspection rather than taking a risk.
Schedule a professional roof inspection within 7 days after a storm to help identify damage beyond ground-level view. Keep the inspection focused on roof condition, including areas that may be difficult to see from outside. A post-storm roof inspection checklist can guide your notes, but a professional assessment can evaluate damage you can’t safely reach. Schedule a professional roof inspection rather than climbing onto a roof that may be damaged.
Rescue Roofing Tulsa: Residential Roof Replacement
Rescue Roofing Tulsa inspects storm damage and can help determine whether roof repair or residential roof replacement is appropriate. Missing shingles, ongoing leaks, or damage across multiple roof areas are reasons to seek a professional assessment. A damaged roof doesn’t automatically need replacement: the extent of the damage and the condition of the affected materials matter.
For isolated damage, roof repair may address the affected area. If an inspection finds broader deterioration, residential roof replacement may be more suitable. Rescue Roofing Tulsa also provides commercial roof replacement and roof inspections for property owners with those needs.
Share your photos and notes so the roof’s visible damage and interior signs can be considered together. Contact Rescue Roofing Tulsa to discuss a roof inspection, repair, or replacement.
Take the next step toward a sound roof
Use your post-storm roof inspection checklist to record what you’ve noticed, not as a reason to climb onto a damaged roof. Share your observations with a roofing professional so the next step is based on the roof’s condition, not guesswork. An inspection can help determine whether targeted repairs or broader work are appropriate.
Rescue Roofing Tulsa provides roof repair, residential roof replacement, and commercial roof replacement. The right option depends on the damage and the condition of the roofing materials. An assessment can connect your observations with a practical plan for protecting the property.
If you’re ready to discuss storm-related roof concerns, contact Rescue Roofing Tulsa today. A clear next step can make it easier to move forward with confidence and care for your home.
Frequently Asked Questions
Should I climb on my roof to inspect after a storm?
No. Don’t climb onto a roof after a storm, especially if shingles are loose, sections appear to sag, or the surface is wet. Hidden damage may make the roof unstable, even where it looks intact. Check what you can see from the ground and leave roof access to a professional. If you see structural damage or an active electrical hazard, keep clear of the area.
What should I photograph for an insurance claim?
If it’s safe, photograph the roof and nearby property before moving storm debris or starting cleanup. Capture the whole building, affected roof sections, damaged vents or gutters, and related interior damage. Include enough surrounding detail to show where each close-up was taken. Keep the original image files and add a short note with the location and date to keep the evidence organized.
How to inspect a roof safely from the ground after a storm?
Walk around the home on stable ground and view the roof from more than one side. Use binoculars to examine roof edges, vents, flashing, and visible slopes without climbing a ladder. Check the ground for fallen branches or roofing pieces that may indicate where damage occurred. Stop if debris, downed wires, or unstable structures prevent a safe route around the property.
What are signs of hail damage on shingles, gutters, and roof vents?
Look for dents in metal gutters, downspouts, and roof vents, as well as granules gathered below roof edges. Shingles may have bruises or irregular marks, though hail damage can be hard to identify from the ground. Check for damage across several exposed areas rather than relying on a single dent. A roof inspection can assess marks that aren’t clear from below.
How to identify wind damage, missing shingles, and lifted flashing?
From the ground, scan roof edges for bare patches, uneven shingle rows, and pieces lying near the building. Flashing around a chimney or roof opening may look bent, separated, or out of place. Don’t pull at loose material to test it. Photograph visible changes and note their locations. If you see exposed roof layers or displaced flashing, arrange a professional assessment.
What interior signs indicate storm-related roof leaks?
New ceiling discoloration, peeling paint, damp wall areas, or moisture in attic insulation may indicate water entering after a storm. Check closets and rooms directly beneath the roof, where stored items can hide early signs. Note whether a spot feels damp or changes after later rainfall. Keep clear of wet electrical fixtures, and record the affected room and location for an inspector.