



Table of Contents
- How Storms Damage Roof Ventilation Systems
- Signs of Roof Vent Damage Every Homeowner Should Know
- Storm Damage Roof Inspection Checklist
- Moisture, Mold, and the Hidden Cost of Blocked Airflow
- Attic Ventilation Repair Cost: What Drives the Price
- DIY vs. Professional Repair: When to Call a Roofer
- Filing an Insurance Claim for Ventilation Damage
- Frequently Asked Questions
Last Updated: September 29, 2026
How Storms Damage Roof Ventilation Systems
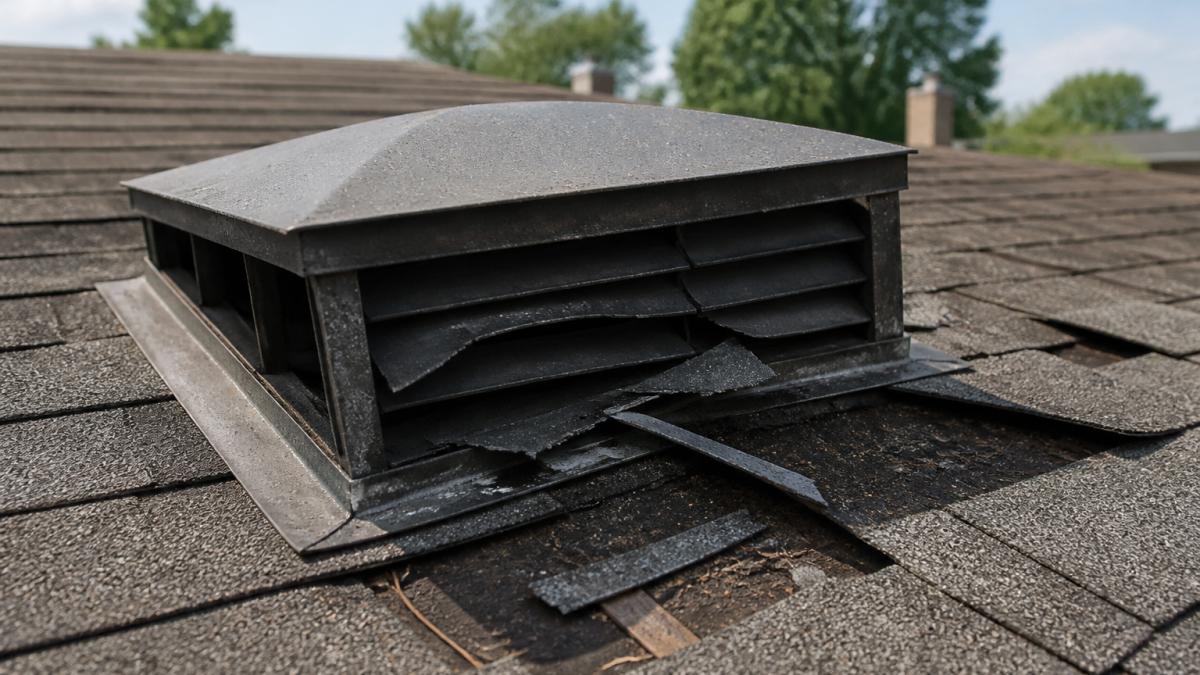
Wind-driven rain, hail, and flying debris turn a working roof ventilation system into a weak point fast, and roof ventilation issues often follow. The most common roof ventilation issues after storm damage start small: a bent vent flange, a cracked housing, or soffit vents packed with leaves and grit. Each restricts airflow and lets moisture in.
Here’s how the damage usually happens:
- Wind uplift lifts shingles and loosens vent flashing around pipes and ridges.
- Hail cracks plastic vent housings and dents metal ones.
- Debris clogs intake vents along the soffit and blocks exhaust paths.
- Driving rain pushes water past seals that were already weak.
A cracked vent housing can look minor but let in enough water to soak insulation within one storm season. Insulation saturation cuts its R-value and can lead to mold growth long before you notice a ceiling stain.
Signs of Roof Vent Damage Every Homeowner Should Know
The clearest signs of roof vent damage show up in two places: the ground and the attic.
What You’ll See From the Ground
Check these from your yard after any major storm:
- Cracked, dented, or missing vent housings on the roof slope
- Lifted or curled shingles near ridge vents and pipe boots
- Rust streaks or water stains around vent flashing
- Soffit vents packed with storm debris or sagging
- Granules collecting in gutters, a sign of shingle wear
What Only Shows Up in the Attic
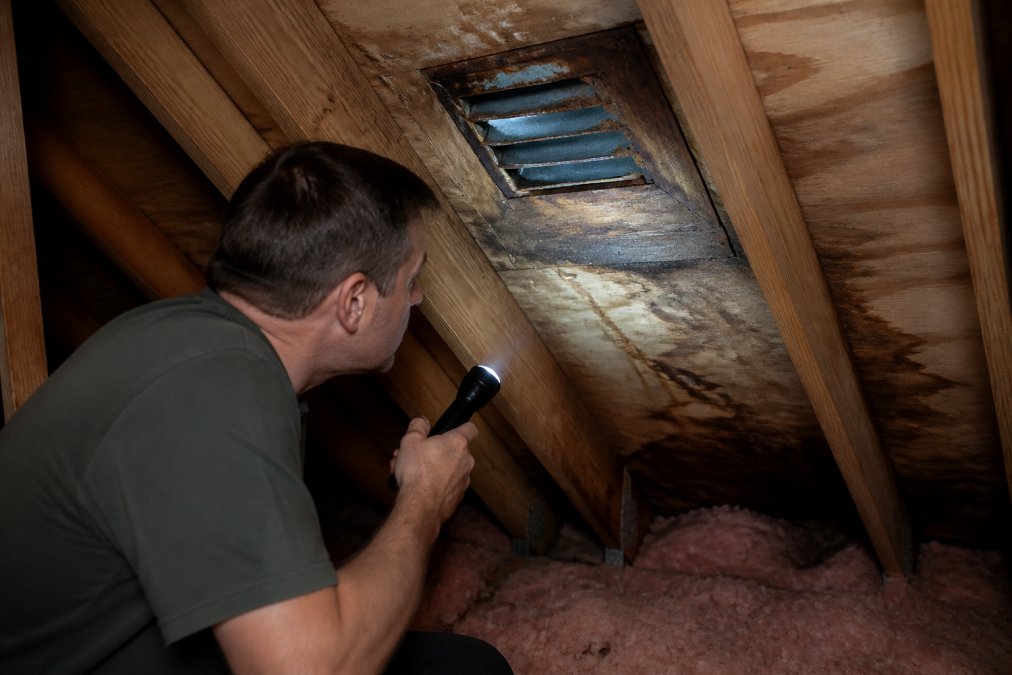
Inside the attic, look for these warning signs:
- Dark damp patches or white mold growth on the roof deck
- Damp or compressed insulation
- Rusted nails and metal fasteners
- A sharp, musty smell
- Daylight showing through gaps around vents
If you spot any of these, the ventilation balance is already off. Catching it now saves thousands later.
Storm Damage Roof Inspection Checklist
Most ventilation guides say to “inspect your roof after a storm” but never explain how, in what order, or what to test on the vent system itself. This checklist is built for the 48 hours after a storm passes, when damage is fresh and your insurance clock is ticking.
Before You Step Outside
- Wait for the all-clear. Downed power lines, active lightning, and saturated ground make the yard more dangerous than the roof.
- Never walk the roof. Wet shingles, hail-slicked granules, and hidden soft spots cause most post-storm injuries. Every check below can be done from the ground or inside the attic.
- Grab the right tools. Binoculars, a bright flashlight, a phone camera, a notepad, and work gloves. A ladder is optional, only for eave-level soffit checks on a stable, dry surface.
Ground-Level Pass (Do This First)
- Walk the perimeter slowly. Note shingle pieces, granules, vent fragments, and nails in the yard. Debris location tells you which roof slope took the hit.
- Scan each roof plane with binoculars. Look for lifted, curled, or missing shingles, especially near ridge vents, pipe boots, and any vent penetration.
- Inspect vent housings from below. Cracked plastic, dented metal, missing screens, or housings shifted off their flange all signal impact damage.
- Check the soffit and fascia line. Storm-blown debris packs into soffit intake vents; sagging or separated soffit panels mean the intake path is compromised.
- Look at the gutters. Granule buildup is normal after a storm; chunks of shingle, vent plastic, or flashing mean something failed up top.
Attic Pass (Where the Real Story Is)
- Check the roof deck for water staining. Dark patches, tide lines, or white chalky residue (efflorescence) mean moisture is getting past the roof system.
- Look for mold and mildew. Surface mold on sheathing or rafters often appears within 48-72 hours of a moisture event in warm, humid conditions.
- Feel the insulation. Damp, matted, or compressed insulation has lost R-value and needs replacement, not just drying.
- Check metal fasteners. Rusted nails and staples in the attic indicate chronic moisture, not a one-time leak.
- Look for daylight. Any visible daylight around a vent, ridge, or penetration is an open air and water path.
Vent-Integrity Test (The Step Competitors Skip)
A vent can look intact and still be failing.
- Tissue test at intake vents. Hold a single-ply tissue against a soffit vent on a calm day. If it doesn’t pull toward the vent, intake airflow is blocked or the vent is damaged.
- Smoke or incense test at exhaust vents. On a still day, hold a lit incense stick near a ridge or static exhaust vent. Smoke should drift out, not hover or blow back. Backdraft means the exhaust path is compromised.
- Temperature check. On a sunny day, attic air should run roughly 10-20°F warmer than outdoor air with proper ventilation. A much larger gap means blocked exhaust.
- Flashing check. Look at every vent’s flashing collar. Lifted, cracked, or missing sealant around the base is the most common post-storm water entry point.
Document Everything as You Go
- Photograph each issue from three angles, wide (location on roof), medium (the vent or shingle), and close-up (damage detail).
- Record the storm date, time, and weather. Hail size, wind gusts, and duration all matter to an adjuster.
- Note when you first observed each issue. Same-day observations carry more weight than damage reported a week later.
- Keep a running list. Vent type, roof location, and visible condition, this becomes the backbone of your claim file.
Do not attempt to tarp, seal, or repair a damaged vent yourself before documenting it. Adjusters need to see the original damage. Temporary repairs are fine after photos are taken, but altering the evidence first is one of the most common reasons a ventilation claim gets denied.
Photograph the same damage spots from three angles: wide, medium, and close-up. Adjusters move faster when they can see exactly where a problem sits on the roof, and it cuts back-and-forth on your claim.
The FEMA guide to filing flood and storm damage claims walks through what documentation adjusters expect. Keep your photos organized by date and location.
Moisture, Mold, and the Hidden Cost of Blocked Airflow
Blocked airflow traps moisture, and trapped moisture is expensive. A balanced attic ventilation system relies on intake vents at the soffit and exhaust vents at the ridge. When either side fails, the whole system stalls.
Here’s what happens next:
- Warm, moist air rises and condenses on the cold roof deck.
- Condensation soaks the wood, insulation, and framing.
- Mold growth starts within days in warm, humid conditions.
- Insulation saturation drops its R-value, so your HVAC works harder.
- Roof deck rot weakens structural integrity over time.
Ice Dams and Shingle Curling After Winter Storms
Winter storms create a different problem: when attic heat escapes unevenly, snow melts, refreezes at the eaves, and forms ice dams. Water backs up under shingles and into the attic.
Attic Ventilation Repair Cost: What Drives the Price
There is no flat rate for attic ventilation repair, and any contractor who quotes one over the phone is guessing. Understand the factors that move the number up or down so you can read a bid intelligently and spot legitimate line items.
The Five Cost Drivers That Actually Matter
| Cost Driver | What It Means | How It Moves the Price |
|---|---|---|
| Number of damaged vents | One cracked housing vs. every vent on a slope | Each additional vent adds labor, material, and flashing work |
| Vent type and material | Soffit, ridge, static, powered, or turbine | Powered and ridge vents cost more to replace than static or soffit |
| Hidden moisture damage | Rot, mold, or soaked insulation discovered in the attic | Turns a vent swap into a decking, insulation, or framing job |
| Roof access and pitch | Steep pitch, multiple stories, or tight lot lines | Adds safety setup, staging, and labor hours |
| Insurance coverage | Storm-related vs. wear and tear | Determines whether you pay out of pocket or file a claim |
What Each Repair Typically Involves
- Single vent housing replacement. Remove the damaged unit, inspect the decking, replace flashing, reseal, and reinstall. The simplest job, but only if the decking is dry and sound.
- Flashing repair around vents. Often the real culprit after a storm. Lifted or cracked flashing lets water in even when the vent itself looks fine.
- Soffit intake restoration. Clearing debris is cheap; replacing crushed or waterlogged soffit panels is not.
- Ridge vent replacement. More involved because it runs the length of the ridge and ties into the shingle field.
- Full ventilation rebalance. When intake and exhaust are mismatched after storm damage, adding or resizing vents restores the system, a design job, not a swap.
When the Cost Jumps
The number climbs fast when storm damage reaches past the vent itself:
- Saturated insulation. Wet insulation has to be removed and replaced, not dried in place. This is often the single largest line item.
- Roof deck rot. Soft or delaminated sheathing must be cut out and replaced before any vent goes back on.
- Mold remediation. Surface mold is a cleaning job; mold that has colonized framing or sheathing requires professional remediation.
- Interior water damage. Ceiling stains, paint failure, or wet drywall below the attic add interior repair to the scope.
How Insurance Fits In
- Covered in most cases: Sudden damage from wind, hail, or flying debris, cracked housings, torn flashing, punctured vents, water intrusion that followed the storm.
- Usually not covered: Gradual deterioration, rust from years of condensation, clogged soffits from accumulated debris, or ventilation that was undersized from the day it was built.
- Your deductible applies. If the repair total lands near or below your deductible, paying out of pocket may be the smarter move and keeps a claim off your record.
- Documentation is everything. Dated photos, a written timeline, and a professional inspection report are what turn a denied claim into an approved one.
The cheapest bid is rarely the cheapest outcome. A low quote that skips decking inspection, flashing replacement, or insulation checks often means the same problem returns after the next storm, and the second repair is never covered.
Rescue Roofing provides accurate aerial quotes so you get a clear picture before work starts, and we assist with insurance claims to help separate storm damage from wear and tear, aiming for no surprise numbers once crews are on the roof.
DIY vs. Professional Repair: When to Call a Roofer
Some fixes are simple. Others are not worth the risk.
Handle it yourself if:
- Debris is blocking soffit vents and you can reach it safely from the ground
- You’re clearing gutters and downspouts
- You’re documenting damage with photos
Call a professional if:
- Vents are cracked, missing, or lifted
- You see mold, rot, or water stains in the attic
- Water infiltration reached insulation or framing
- The roof pitch is steep or the damage is widespread
- You’re filing an insurance claim
The DIY-versus-pro line comes down to two questions: can you reach it safely, and does the fix touch the roof’s water barrier? If either answer is no, call a roofer. A botched vent repair often costs more to correct than the original job.
Filing an Insurance Claim for Ventilation Damage
Storm damage is often covered, but the claim lives or dies on documentation. Insurers want proof the damage came from a specific storm, not from age.
Build your claim file with:
- Dated photos of every damaged vent and shingle
- Receipts or records showing your roof’s age and prior condition
- A written timeline of the storm and when you noticed damage
- A professional inspection report
Report the damage as soon as you spot it. Most policies require prompt notice after a storm, and delaying can give an adjuster a reason to question the claim.
Frequently Asked Questions
What are the common problems with roof vents after high winds?
High winds can rip off vent covers, crack vent housing, and bend flashing around pipe boots and ridge vents. Storm debris like branches and shingle fragments often lodge inside soffit and ridge vents, restricting airflow. Even if the vent looks intact from the ground, the seal around it may be broken, letting water infiltrate the attic. A professional inspection after any major storm is the only way to confirm whether your roof ventilation issues are minor or serious.
How do I know if my roof vents were damaged by hail or wind?
Look for dents or cracks in metal vent housings, missing vent covers, granule loss on nearby shingles, and bent or lifted flashing. From inside the attic, check for daylight around vent openings, water stains on the roof deck, or rust streaks below vents. Hail damage often shows as dimples on aluminum vents that are easy to miss from the ground. If you spot any signs of roof vent damage, document them with photos before contacting a roofer.
Can poor attic ventilation lead to mold growth after a storm?
Yes. When storm damage blocks intake or exhaust vents, moisture from humid air, rain intrusion, or condensation has nowhere to escape. Attic temperatures rise, and that trapped moisture saturates insulation and framing. Mold can begin growing on roof decking within 24 to 48 hours of sustained moisture exposure. Along with mold, you may see roof deck rot, insulation saturation, and higher energy bills as your HVAC system works harder to compensate for trapped heat.
How long do you have to file an insurance claim for storm-related roof damage?
Most insurance policies require you to report storm damage within one year of the event, but some states and policies set shorter windows, often 30 to 90 days. Oklahoma policies typically follow the one-year standard, but filing sooner is always better because adjusters can verify damage before it worsens. Document everything with dated photos, keep receipts for emergency repairs, and contact your insurer as soon as you notice ventilation problems. A roofing contractor experienced with claims can help you meet deadlines and document damage correctly.