



Table of Contents
- Why Spotting Storm Damage Early Matters
- How to Inspect Your Roof After a Storm
- Common Signs of Roof Damage: Shingles, Hail, and Wind
- Interior Damage: Ceiling Stains, Leaks, and Water Bubbles
- Exterior Damage Beyond the Roof: Windows, Siding, and Gutters
- How to Document Storm Damage for an Insurance Claim
- Storm Damage Insurance Claim Checklist: What to Do Before Calling Your Insurer
- What to Do Before Calling Your Insurer About Storm Damage
- Frequently Asked Questions
Last Updated: October 6, 2026
Why Spotting Storm Damage Early Matters
When a storm hits your property, it’s critical to spot storm damage early, as it isn’t always obvious. Missing shingles catch your eye. Water stains on the ceiling grab your attention. But hidden damage can cost thousands to repair later if you don’t catch it now.
The key is knowing what to look for. Many homeowners miss critical damage simply because they don’t know where to check. Interior leaks, exterior wear, and structural issues hide until they become expensive problems.
This guide walks you through a systematic inspection process. We’ll cover roof assessment, interior signs, exterior damage beyond the roof, and how to document everything for your insurer. By the end, you’ll know exactly how to spot storm damage and prepare for the claim process.
How to Inspect Your Roof After a Storm
Safety first: when to inspect and when to wait
Never inspect a roof while it’s wet or icy. Wait at least 24 hours after a storm passes and conditions dry out. Wet surfaces are slippery. Falls from roofs cause serious injuries.
If the storm was severe, consider waiting for a professional inspection instead. High winds, heavy rain, or hail create hazardous conditions. Your safety matters more than a quick assessment.
When conditions are safe, use binoculars to view the roof from the ground. This approach keeps you safe while letting you spot obvious damage. If you do climb onto the roof, wear non-slip shoes, use a safety harness, and have someone spot you from below.
Ground-level roof inspection techniques
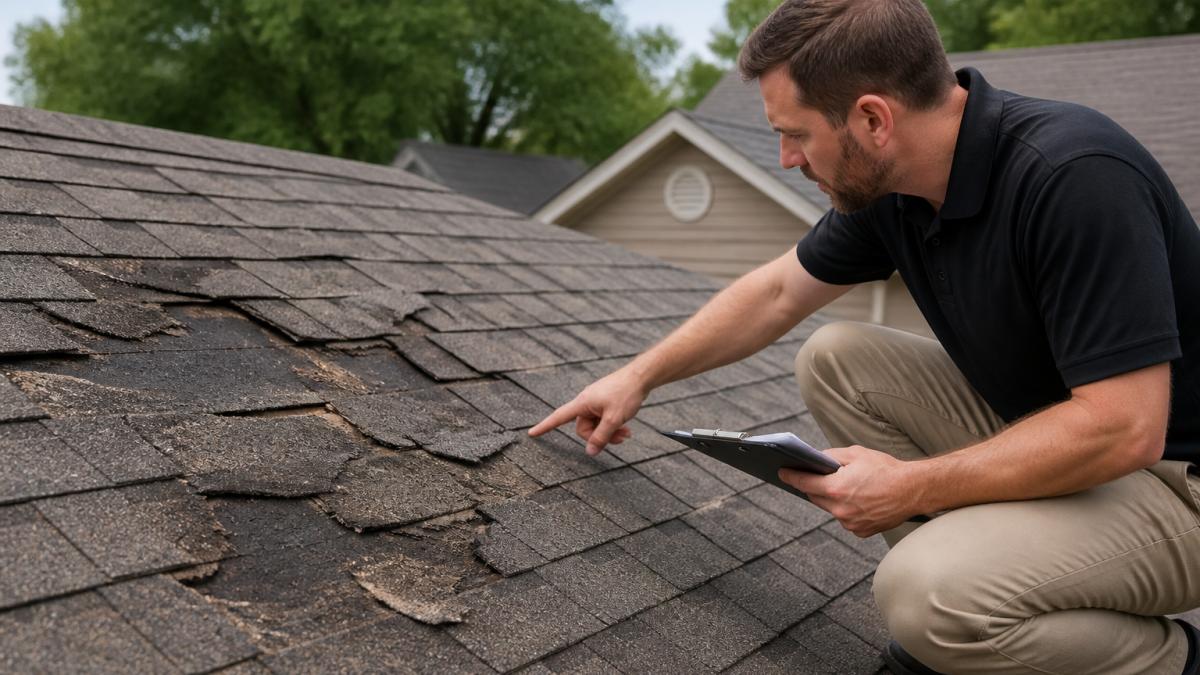
Start from the ground with binoculars. Look at the roof from multiple angles, front, back, and sides. Scan for missing shingles, dark patches, and lifted edges.
Walk around your property’s perimeter. Look at gutters, downspouts, and the roof edge. Check for debris piled in gutters, leaves, branches, and shingle fragments indicate roof damage.
Next, inspect the attic. Go inside on a clear day without using flashlights. Let your eyes adjust to natural light coming through roof vents.
If you see active water dripping or pooling, mark the location. This helps your insurance adjuster pinpoint the leak source.
Common Signs of Roof Damage: Shingles, Hail, and Wind
Missing, cracked, and lifted shingles
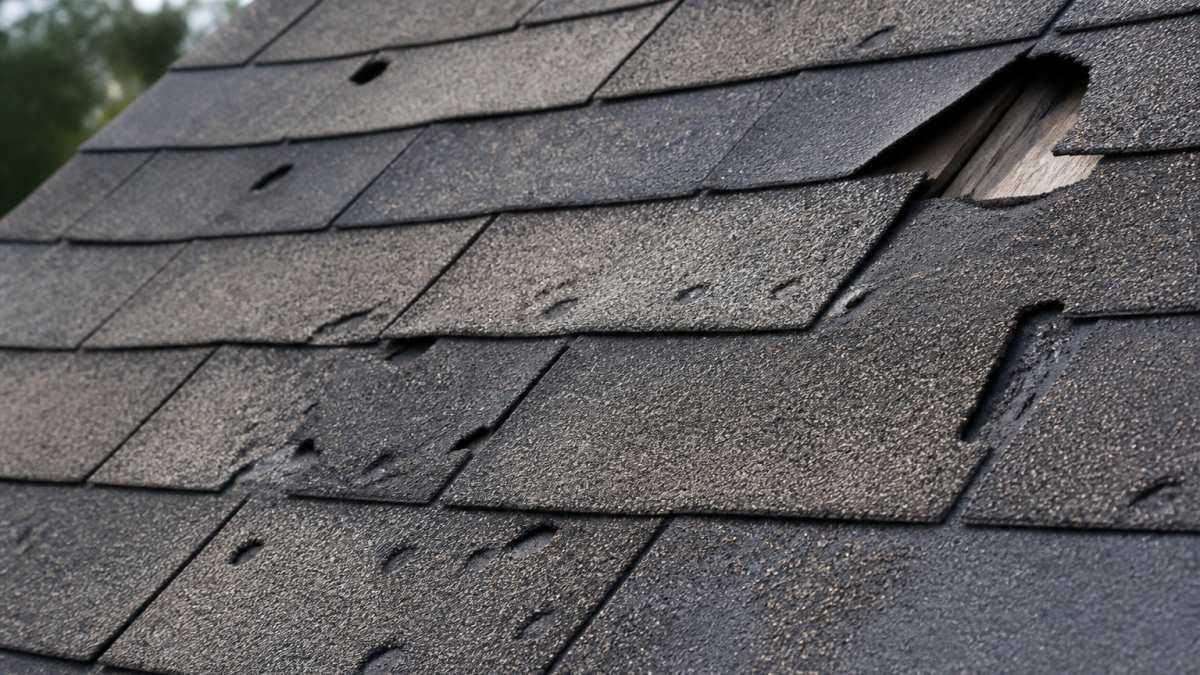
Missing shingles are the easiest damage to spot. Shingles can blow off during high winds or get torn away by hail. When shingles are gone, the underlying roof deck is exposed. Water penetrates quickly.
Cracked shingles are less obvious but equally serious. Hail strikes create cracks that spread over time. Wind can cause shingles to curl upward at the edges. Lifted shingles no longer seal properly against water.
Look for shingles that have shifted position. Shingles should lie flat and overlap in a consistent pattern. Misaligned shingles indicate wind damage or impact trauma.
Hail and wind damage indicators
Hail creates round dents on shingles. These dents don’t always penetrate the shingle, sometimes they’re just cosmetic damage. But repeated dents weaken the shingle material. The protective granules can crack or chip away, exposing the asphalt underneath.
Wind damage shows up as torn shingles, lifted edges, and missing sections. Wind can peel shingles back like opening a book. Once lifted, shingles don’t reseal.
Dark spots or streaks on shingles sometimes indicate algae growth, not damage. But if dark spots appear suddenly after a storm, they may indicate bruising from hail impact.
Check the roof ridge and edges first. These areas take the most wind force. Damage here spreads downward across the roof.
Interior Damage: Ceiling Stains, Leaks, and Water Bubbles
Water stains on ceilings are the clearest sign of a roof leak. Stains appear as brown or yellowish discoloration.
Water bubbles in drywall or paint indicate trapped moisture. The ceiling material is separating from the structure underneath. This means water is pooling above the ceiling.
Wet insulation in the attic signals a serious leak. Insulation loses its effectiveness when saturated. Mold can develop in damp insulation. Check for soft spots in insulation and discoloration.
Look for water stains on wooden beams and rafters in the attic. Fresh stains are light-colored. Older stains are dark brown.
Musty odors in rooms below the attic suggest hidden moisture. Mold thrives in damp environments. Don’t ignore this warning sign.
Exterior Damage Beyond the Roof: Windows, Siding, and Gutters
Storm damage extends beyond the roof. Check windows for cracked glass or bent frames. Hail can shatter windows. Wind can force windows open or damage seals.
Examine siding for dents, cracks, and missing sections. Vinyl siding dents easily from hail. Wood siding can split or splinter. Metal siding shows dents clearly.
Gutters and downspouts take significant storm damage. Gutters can separate from the house, bend, or fill with debris. Downspouts can crack or disconnect.
Check soffit and fascia boards. These trim pieces can crack, warp, or separate from the roof edge. Damage here allows water to enter the attic.
Look at chimney flashing, the metal seal where the chimney meets the roof. Flashing can bend or separate during storms. This is a common leak source.
How to Document Storm Damage for an Insurance Claim
Photo and video evidence protocol
Take photos from multiple angles. Capture wide shots showing the overall damage and close-ups of specific areas. Use natural daylight, avoid shadows that hide details.
Include reference objects in photos. A coin, ruler, or common object shows scale. This helps adjusters understand the size of damage.
Document the date and location. Many phones automatically timestamp photos. If yours doesn’t, write the date on a notepad and photograph it alongside damage.
Shoot video while walking around the property.
Get photos of interior damage too. Ceiling stains, water bubbles, wet insulation, and attic conditions all matter. These images prove the damage extends beyond surface-level issues.
Creating a written damage inventory
Write a detailed list of all damage you found.
Include dates. When did the storm occur? When did you first notice damage? When did you conduct your inspection? Timeline matters for insurance claims.
Note any pre-existing damage you observed. This prevents confusion later. Your adjuster needs to distinguish storm damage from wear and tear.
Describe what you did to prevent further damage. Did you place tarps over holes? Did you run dehumidifiers in the attic? Document these temporary repairs. Your insurer may cover prevention costs.
Keep receipts for any temporary repairs or emergency services. These are part of your claim documentation.
Storm Damage Insurance Claim Checklist: What to Do Before Calling Your Insurer
Distinguishing storm damage from pre-existing wear
Pre-existing damage looks different from storm damage. Wear and tear happens gradually. Storm damage appears suddenly after a specific weather event.
Shingles that are curling at the edges may indicate age (wear and tear) or recent wind damage. The timing matters. If shingles curled gradually over years, that’s pre-existing.
Rust on metal components like gutters or flashing suggests age. But bent gutters or separated flashing from a storm is new damage.
Water stains on ceilings tell a story. Old stains are dark brown and may have mold growth. Fresh stains from recent leaks are lighter and appear suddenly.
Document the difference in your written inventory.
Identifying hidden and delayed damage
Some damage doesn’t appear immediately. Water takes time to saturate insulation and wood. Mold develops over days or weeks in damp environments.
Check the attic a few days after the storm. Initial inspection might miss saturated insulation or slow leaks. Return to the attic after 48 hours and look again.
Watch your ceilings for new stains over the following weeks. A small leak can create large stains as water spreads through the attic space.
Listen for sounds in the attic during rain. Dripping or running water indicates active leaks. Mark these locations for your adjuster.
Delayed damage becomes your responsibility if you don’t report it quickly. Most insurance policies require prompt notification of damage. Check your policy for specific deadlines.
Understanding policy deadlines and deductibles
Your insurance policy sets a deadline for reporting damage. Many policies require notification within 30 days. Some require immediate reporting. Check your policy documents.
Missing this deadline can result in claim denial. Don’t wait. Report damage as soon as you’ve documented it.
Your deductible is the amount you pay before insurance coverage kicks in. A $1,000 deductible means you pay the first $1,000 of repairs. Insurance covers the rest.
Some policies exclude certain damage types. Wind damage might be covered while hail damage is excluded (or vice versa).
Review your policy before calling your insurer. Know what’s covered, what your deductible is, and the reporting deadline. This information speeds up the claim process.
What to Do Before Calling Your Insurer About Storm Damage
Temporary repairs and preventing further damage
Stop the bleeding before calling your insurer. If water is actively leaking, place buckets to catch it. Mark the location for your adjuster.
Tarps over holes prevent additional water intrusion. Secure tarps with rope or nails.
Run dehumidifiers in affected areas. Reduce moisture to prevent mold growth. Keep the dehumidifier running until the space dries completely.
Document these temporary repairs. Take photos. Keep receipts. Your insurance may cover the cost of emergency measures.
Prevent water from spreading. If drywall is wet, increase air circulation with fans. Open windows on dry days. Ventilation speeds drying and reduces mold risk.
Don’t throw away damaged materials. Your adjuster may want to see them. Keep samples of damaged insulation, drywall, or roofing materials.
When to call a professional before contacting your insurance company
Call a roofing professional if you can’t safely access the roof.
Call a professional if you suspect structural damage. Sagging roof lines, cracked beams, or separated walls need expert evaluation.
Call a professional if you’re unsure whether damage is storm-related or pre-existing. A qualified inspector can distinguish between the two.
Professional inspectors document damage in detail. They photograph everything. They create written reports with measurements and locations. This documentation supports your claim.
At Rescue Roofing, we assist with insurance claims from start to finish.
Storm damage assessment requires patience and attention to detail. You’re building a case for your insurance claim.
Once you’ve completed your inspection and gathered documentation, contact your insurance company. Have your photos, written inventory, and policy information ready.
Frequently Asked Questions
What are the main signs of storm damage on a roof?
Look for missing, cracked, or lifted shingles, dark spots or dents from hail, curling or buckling shingles, and granule loss. Wind damage often appears as lifted or torn shingles, while hail creates small dents or bruises across the surface. Interior signs include ceiling stains, water bubbles, and leaking in the attic. If you spot any of these after a storm event, document them with photos before contacting your insurance company.
How do I document storm damage for an insurance claim?
Take clear photos and videos of all visible damage from multiple angles and distances. Capture both exterior damage (roof, siding, gutters, windows) and interior damage (ceiling stains, water leaks, wet insulation). Create a written damage inventory listing each damaged area, the type of damage, and its location. Include the date the storm occurred and when you discovered the damage. Organize all evidence in one folder before submitting to your insurance company.
Should I call a roofer before contacting my insurance company?
It depends on the severity. If there’s active leaking or risk of further damage, make temporary repairs to prevent water intrusion, then contact your insurer. For documentation purposes, a professional inspection can help identify hidden damage and provide a detailed damage assessment that supports your claim. However, avoid extensive repairs before the insurance adjuster inspects the property, as this may complicate the claim process.
How do I distinguish storm damage from pre-existing wear on my roof?
Storm damage typically appears sudden and localized to specific areas after a weather event. Pre-existing wear is gradual and affects larger sections uniformly over time. Look at the damage pattern: hail creates random dents, wind tears shingles in consistent directions, and age causes uniform curling or fading. If damage surrounds a recent storm date and appears fresh with exposed underlayment or bright granules, it’s likely storm-related. When in doubt, have a professional assess the damage before filing your claim.