



Table of Contents
- Warning Signs of Hidden Roof Leaks
- How to Inspect Your Attic for Roof Leaks
- Signs of a Slow Roof Leak to Watch For
- Roof Leak Detection Tools and Methods
- How to Identify Hidden Roof Leaks During Seasonal Inspections
- When to Call a Professional Roof Inspector
- Documenting Roof Damage for Insurance Claims
- Conclusion
Last Updated: August 11, 2026
Warning Signs of Hidden Roof Leaks
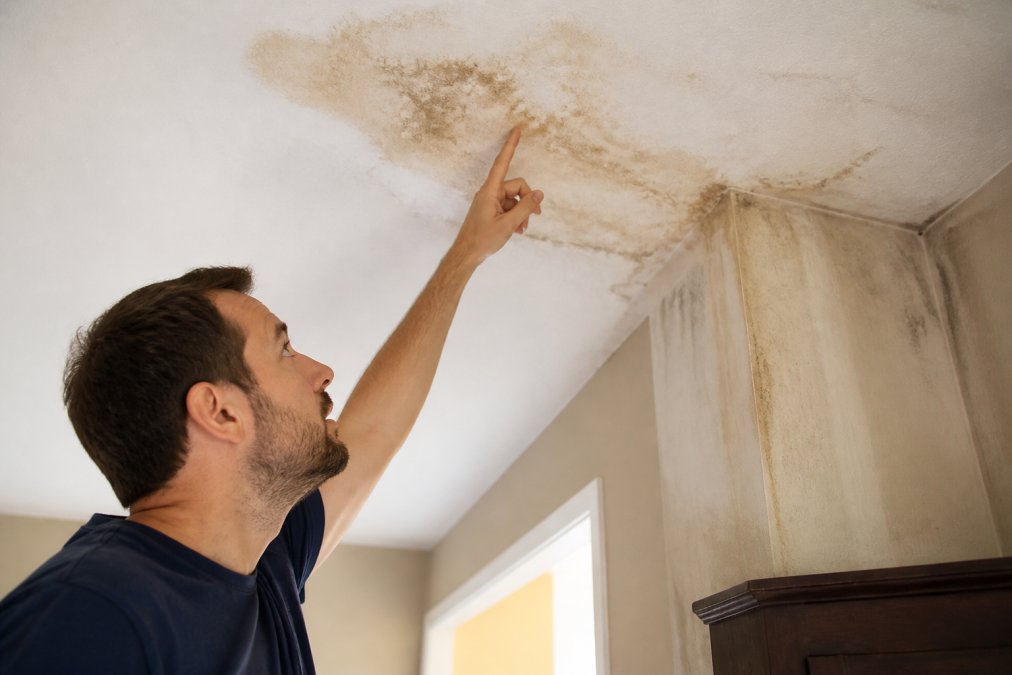
Water stains on ceilings are the most obvious red flag, look for yellowish or brownish discoloration, especially after heavy rain or snowmelt. These stains expand over time, and their size rarely reflects the actual damage underneath.
Musty odors in your attic or upper floors signal moisture accumulation from mold and mildew colonizing damp wood and insulation. If you notice it, water has likely been present for days or weeks.
Warped or sagging drywall on ceilings indicates structural damage from prolonged water exposure. Peeling paint or wallpaper on upper walls often accompanies hidden leaks as moisture migrates through wall cavities.
Check your attic insulation for wet spots or discoloration. Compressed, darkened insulation shows where water has been pooling and loses its thermal properties, becoming a breeding ground for mold.
Ignoring early warning signs can lead to structural rot, mold remediation costs, and insurance claim complications. The longer a leak persists, the more expensive and invasive the repair becomes.
How to Inspect Your Attic for Roof Leaks
Your attic is ground zero for detecting hidden roof leaks before they destroy ceilings and walls below. Schedule your inspection on a dry day with a flashlight, moisture meter, and your phone to photograph evidence.
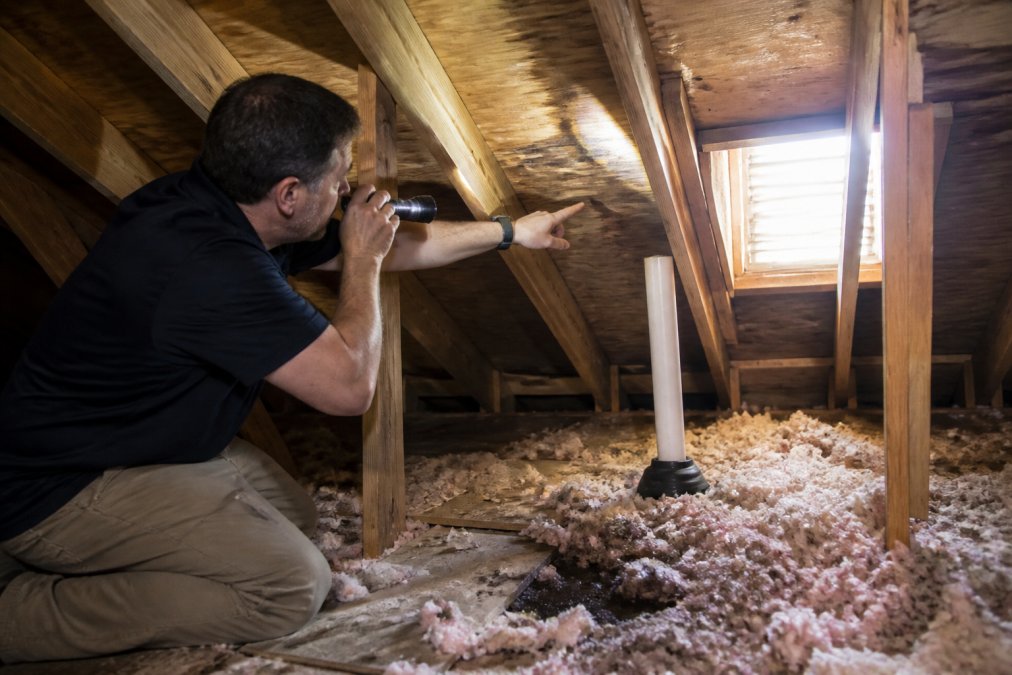
Move slowly through the attic, scanning the underside of the roof decking for water stains that appear as dark streaks or patches. Pay special attention to areas where the roof pitch changes, where valleys meet the main roof, and around penetrations like vent pipes or chimneys, these are high-risk zones for water intrusion.
Check roof penetrations carefully. Flashing around vent pipes, chimneys, and skylights is where most leaks originate. Look for gaps, separation, or deterioration in the flashing material. Ice damming during winter forces water under shingles and through flashing joints.
Examine your attic insulation for compression, discoloration, or wet spots. Use a moisture meter to check wood framing, decking, and insulation. Readings above 15% moisture content indicate a problem requiring professional attention.
Document everything with photos and notes, marking the location of stains, wet areas, and damaged flashing. This documentation becomes crucial for insurance claims and helps professional inspectors understand the leak’s path and duration.
Check your attic after heavy rain or snowmelt when water intrusion is most likely to be visible. Timing your inspection this way increases the chances of spotting active leaks or fresh evidence.
Signs of a Slow Roof Leak to Watch For
Slow roof leaks are deceptive because they cause damage gradually, often going unnoticed for months. Water stains that don’t expand but persist indicate consistent water intrusion, even if the volume is small.
Soft or spongy wood in your attic framing signals advanced rot from prolonged moisture exposure. Press your finger against exposed wood, it should feel solid and hard. If it yields to pressure, structural decay is underway and requires immediate professional assessment.
Mold growth on attic surfaces appears as black, green, or white patches on wood, insulation, or framing. Mold thrives in damp environments and indicates moisture has been present long enough for colonization.
Granule loss from asphalt shingles accelerates when water intrusion is present. If you’re finding excessive granules in gutters or notice bald spots on shingles, water damage may be occurring beneath the surface.
Gutter blockage from debris forces water to overflow and cascade down exterior walls. This moisture can seep into wall cavities and migrate upward into the attic.
Roof Leak Detection Tools and Methods
Professional-grade tools dramatically improve your ability to identify hidden roof leaks and pinpoint their exact location.
Moisture meters measure wood and material moisture content directly. Digital moisture meters provide readings in seconds, revealing where water has infiltrated. Readings above 15% indicate problematic moisture levels.
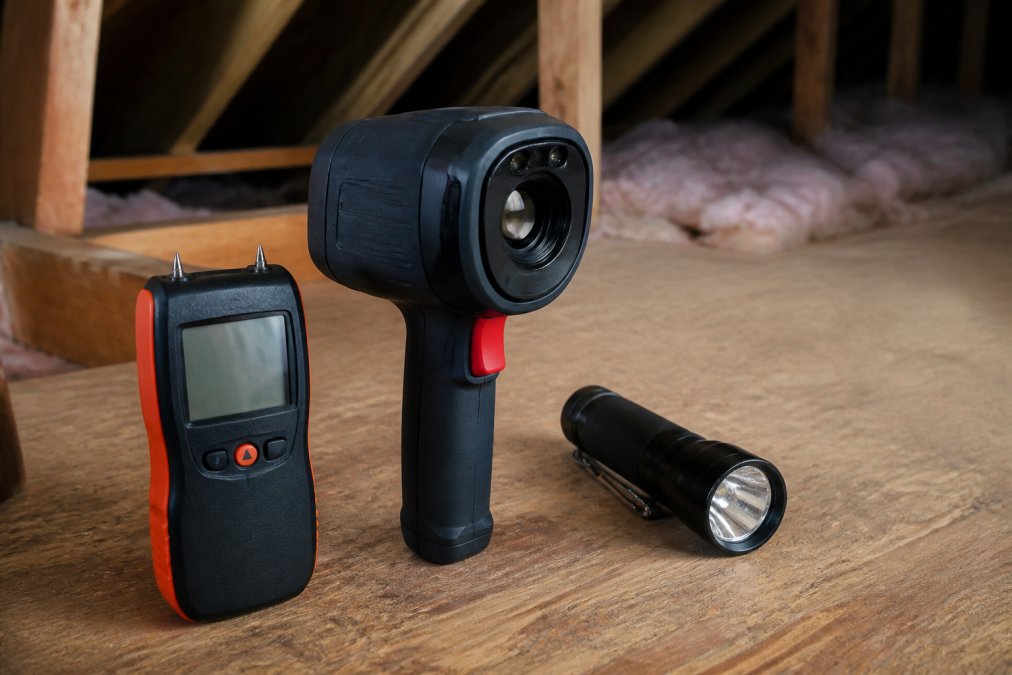
Thermal imaging cameras detect temperature differences caused by moisture. Water-saturated materials retain heat differently than dry materials, creating visible patterns on thermal images. Professional inspectors use thermal imaging to identify water intrusion without invasive testing.
Flashlights with strong LED beams illuminate dark attic spaces and help you spot water stains, mold growth, and damaged materials. Headlamps free both hands for examining materials and taking photographs.
Borescopes are small cameras on flexible cables that let you peer into wall cavities and under roofing materials without removing them. They’re particularly useful for examining the space between roof decking and shingles where many slow leaks hide.
Water intrusion tests involve introducing water to suspect areas while monitoring for leaks. Professionals carefully apply water to roof sections while someone watches from the attic for signs of intrusion.
A simple but effective method involves checking your roof from above during or shortly after rain. Water patterns on the roof surface reveal drainage problems and pooling areas where water intrudes.
The combination of visual inspection, moisture measurement, and thermal imaging provides the most complete picture of hidden roof leaks. No single tool tells the whole story.
How to Identify Hidden Roof Leaks During Seasonal Inspections
Seasonal changes create different conditions that expose roof leaks at different times.
Spring inspections reveal damage from winter weather. Snow load, ice damming, and freeze-thaw cycles stress your roof system. Look for shingle damage, flashing separation, and water stains that accumulated during winter months.
Summer inspections focus on heat-related issues. Intense sun exposure can open gaps in flashing and accelerate shingle deterioration. After summer storms, inspect for new damage and water intrusion signs.
Fall inspections address debris accumulation and preparation for winter. Leaves and branches clog gutters, preventing proper water drainage. Clear gutters thoroughly and inspect roof penetrations before winter arrives.
Winter inspections are challenging but crucial. Ice damming forces water under shingles and through flashing. If you can safely access your attic during winter, check for fresh water stains and wet insulation.
Create a seasonal checklist to ensure consistent inspection:
- Spring: Check for winter damage, water stains, flashing separation
- Summer: Inspect shingles, check for heat damage, clear debris after storms
- Fall: Clear gutters, inspect penetrations, prepare for winter
- Winter: Monitor for ice damming, check attic for water intrusion
Document your findings each season. Photos and notes create a record that helps you and professionals track patterns.
When to Call a Professional Roof Inspector
Call a professional if you discover water stains in your attic or on ceilings. Even small stains warrant inspection because the visible damage rarely represents the full extent of water intrusion.
Visible roof damage requires professional evaluation. Missing shingles, visible flashing separation, or obvious deterioration need expert assessment to determine repair scope and urgency.
If your roof is over 15-20 years old, schedule professional inspections every 2-3 years. Aging roofs develop problems that aren’t obvious to untrained eyes.
After severe storms, contact a professional for damage assessment. Storm damage may not be immediately visible but can compromise your roof’s integrity.
Persistent musty odors in your attic demand professional investigation. Mold growth indicates active moisture problems that need expert remediation.
At Rescue Roofing, we understand that identifying hidden roof leaks requires experience and proper tools. Our team provides thorough inspections using advanced detection methods to pinpoint problems before they become catastrophic. We document findings clearly so you understand exactly what needs repair and why.
If you’re uncertain whether a problem warrants professional attention, call anyway. A professional inspection costs far less than repairing water damage that spreads unchecked.
Delaying professional inspection when you suspect a leak allows damage to compound. Water damage accelerates exponentially, a small leak becomes a major structural problem within months.
Documenting Roof Damage for Insurance Claims
Insurance claims require thorough documentation of roof damage and water intrusion. Proper documentation strengthens your claim and ensures you receive fair compensation for repairs.
Photograph all visible damage clearly. Take wide shots showing the overall damage area, then close-ups of specific problems. Include photos of water stains, damaged shingles, flashing problems, and any visible mold or structural damage.
Document the date and time of your inspection. Note weather conditions and any recent storms or weather events that may have caused damage.
Create a written description of all damage you observe. Describe locations precisely and include measurements when possible. Note the color and extent of stains.
Keep receipts for any temporary repairs or mitigation efforts. If you hire someone to tarp your roof or remove water, document these expenses.
Record the names and contact information of any professionals who inspect your roof. Get written estimates for repairs from licensed contractors.
File your claim promptly after discovering damage. Contact your insurance company immediately and provide all documentation you’ve gathered.
When the insurance adjuster inspects your roof, be present and point out all damage you’ve documented. Share your photos and notes. The adjuster’s report becomes the basis for claim approval.
Keep copies of all correspondence with your insurance company. Save emails, letters, and claim documentation.
Professional documentation from Rescue Roofing strengthens insurance claims significantly. Our detailed inspection reports include photos, measurements, and professional assessment of damage extent and cause. We communicate directly with insurance adjusters to ensure your claim reflects the actual damage and necessary repairs.
Identifying hidden roof leaks before they cause major damage protects your home’s structural integrity and prevents costly water damage repairs. Regular attic inspections, seasonal maintenance, and prompt professional assessment catch problems early. When you suspect a leak, document your findings thoroughly and contact a professional immediately. The cost of professional inspection is negligible compared to the expense of repairing advanced water damage and mold remediation. Contact Rescue Roofing today for a comprehensive roof inspection using advanced detection tools and techniques that identify hidden leaks and protect your property.
Frequently Asked Questions
Can you have a roof leak and not know it?
Yes. Hidden roof leaks often develop slowly between roof layers, in attic spaces, or behind walls. Water may travel along rafters or decking before becoming visible as ceiling stains or mold. Early detection requires regular attic inspections and attention to subtle signs like musty odors, slightly discolored insulation, or soft spots in attic decking. By the time water reaches your ceiling, significant damage may have already occurred inside the roof structure.
What are the early warning signs of a hidden roof leak?
Early signs include musty odors in the attic, damp insulation, small water stains on roof decking or rafters, minor ceiling discoloration, and condensation on attic framing. Mold or mildew growth, even in small patches, indicates moisture accumulation. Check around roof penetrations like vent pipes, chimney flashing, and valleys where water intrusion commonly begins. Seasonal inspections after heavy rain or ice damming events help catch leaks before they spread.
How do I find a water leak that is not visible?
Use a moisture meter to detect damp areas in insulation, decking, and framing that appear dry. Thermal imaging cameras reveal temperature differences caused by moisture. Inspect attic spaces with a bright flashlight, paying special attention to roof valleys, flashing around chimneys and vents, and areas where ice damming occurs. Check the underside of the roof deck and follow water runoff patterns downward. If moisture is present but no visible stain exists, the leak is likely active or recently stopped.
When should I call a professional roof inspector?
Call a professional if you detect moisture or mold in your attic, notice ceiling discoloration that may indicate water intrusion, suspect structural damage or warped decking, or find evidence of an active leak you cannot locate. Professional inspectors use thermal imaging and specialized tools to identify hidden damage and assess structural integrity. They also document findings for insurance claims. Schedule inspections annually, after major storms, or if your roof is over 15 years old.
This article was written using GrandRanker