



Table of Contents
- Why You Need a Professional Roof Inspection After a Storm
- Signs of Hail Damage on Your Roof You Should Never Ignore
- Why Hidden Storm Damage Is Dangerous and Costly
- How to File a Roof Insurance Claim After Storm Damage
- How Long Does a Roof Inspection Take and What to Expect
- Risks of DIY Roof Inspections and Post-Storm Safety Protocols
- The 72-Hour Rule vs. Long-Term Leaks: What You Need to Know
- Conclusion
- Frequently Asked Questions
Last Updated: September 12, 2026
Why You Need a Professional Roof Inspection After a Storm
A professional roof inspection after a storm is the only reliable way to confirm whether your roof still protects your home, because the damage that matters most is usually invisible from the ground. This guide from Rescue Roofing covers what inspectors look for, how to file an insurance claim, and why the first few days decide who pays.
Most homeowners see shingles still in place and assume they escaped the worst. That assumption costs them: hail bruises an asphalt shingle without cracking it, wind breaks the seal at the edges, and water finds those openings months later.
Storm damage rarely announces itself. The homeowners who get claims approved are the ones who document conditions within days, not months.
Signs of Hail Damage on Your Roof You Should Never Ignore
Hail damage is deceptive because the roof often looks intact from street level. The telltale marks show up in the granular surface, the metal components, and soft spots visible only under close inspection.
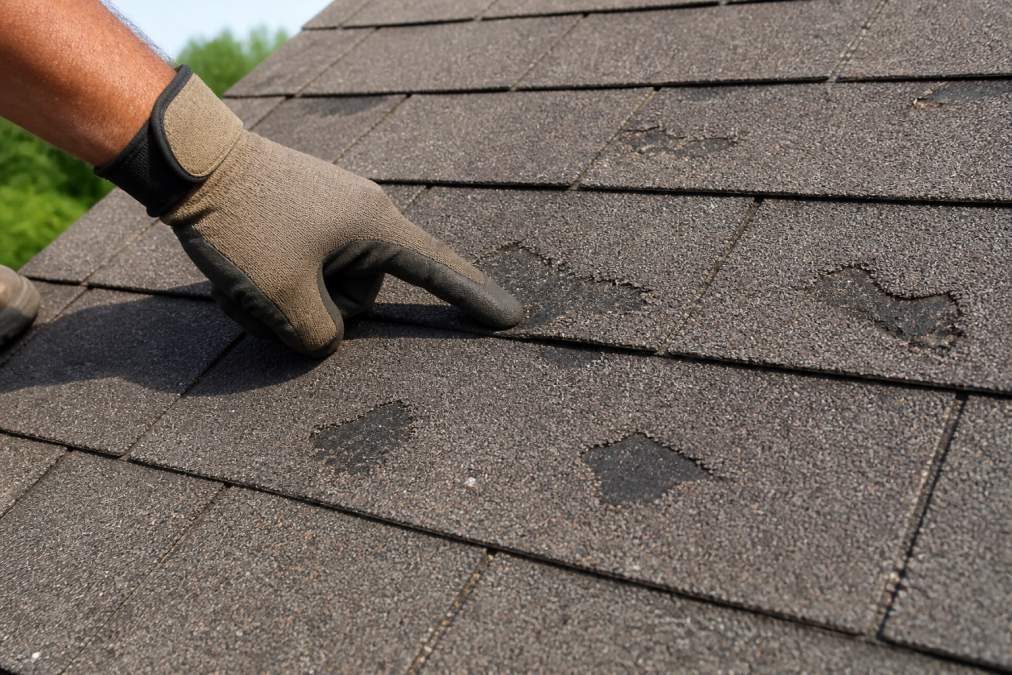
What Hail Does to Asphalt Shingles
Hail impact knocks granules loose, exposing the asphalt underneath to direct sunlight, and those bald patches age fast. You’ll also see random bruising, soft spots, and cracks radiating from the strike point. A sudden buildup of dark granules in the gutters and downspouts is one of the clearest signs of hail damage on roof surfaces.
Hidden Damage on Metal and Flat Roofs
Metal roofing tells a different story: hail leaves dented panels and compromised seams, and while a dent alone doesn’t always mean failure, it weakens the panel’s ability to shed water over time. Flat roofs hide damage in the membrane, where punctures and blisters let water pool and seep through the underlayment. An inspector who only knows shingles will miss half the problem.
Why Hidden Storm Damage Is Dangerous and Costly
Water infiltration is the real threat, not the cosmetic damage you can see. Once moisture gets past the shingles and underlayment, it reaches the decking, insulation, and eventually your ceiling.
The sequence is predictable. A lifted shingle lets in a trickle. The moisture barrier fails. Rot and mold begin in the attic, often unnoticed for weeks. By the time a brown stain appears on your ceiling, the repair has grown from a shingle patch to a decking replacement.
Structural integrity is the bigger concern: repeated wetting and drying weakens framing over time. An attic inspection during a professional assessment catches most of this early, because inspectors look at the underside of the deck, not just the surface.
How to File a Roof Insurance Claim After Storm Damage
Filing a roof insurance claim starts with documentation, not a phone call to your insurer. The process rewards homeowners who can prove the damage happened during a specific storm event. Most denials are not about whether damage exists, they are about whether the homeowner can tie that damage to a covered date and cause.
Your first move is a professional inspection report. An insurer’s adjuster assesses liability against your policy language, and their scope of loss is often narrower than what a contractor sees on the roof. A roofing contractor who documents the damage independently gives you a written record you can compare line by line.
From there, the process looks like this:
- Report the damage to your insurer and get a claim number in writing before you hang up.
- Schedule the adjuster visit and be present if possible, with your inspection report in hand.
- Submit your inspection report and photos alongside the claim, not after the adjuster’s estimate arrives.
- Review the adjuster’s estimate against your contractor’s findings, line item by line item, shingle count, underlayment, flashing, ridge cap, decking.
- Negotiate discrepancies before signing anything. You can request a re-inspection or invoke the appraisal clause in most policies.
- Schedule repairs only after the claim is settled and you have a written scope of work.
Documentation Checklist for Your Claim
Most claims fail on paperwork, not merit. The evidence you collect in the first week decides whether the loss is covered. Use this checklist before you file:
- Date-stamped photos of every damaged area, wide shots and close-ups, taken before any tarping or repair
- Your professional roof inspection report with material-specific findings (asphalt, metal, tile, flat membrane)
- Receipts or records for any emergency tarping done after the storm
- A written summary of the storm date and duration, including the National Weather Service storm report for your ZIP code if available
- Your insurance policy number and coverage details, including your deductible
- Notes from any contractor who inspected the roof, with their license number
- Copies of all correspondence with your insurer, including emails and text messages
- Photos of interior damage, ceiling stains, attic moisture, wet insulation, with a ruler or coin for scale
- A written log of the date you first noticed each issue
Photograph your gutters and downspouts before you clean them. The granule buildup inside is evidence of hail strike, and it disappears the moment you rinse it out. Do the same for any dented downspouts, vents, or gutter aprons, those metal dents are often the strongest proof of hail size and direction.
Material-Specific Evidence That Strengthens a Claim
Different roofing materials fail differently, and your documentation should reflect that. Asphalt shingles show granule loss, bruising, and mat fracture, photograph bruised spots next to a coin or tape measure for scale. Metal roofs show dents and seam separation; photograph both from two angles. Tile roofs crack and slip, and the underlayment beneath is often the real loss, ask your inspector to document it, not just the tile. Flat and low-slope membranes blister, puncture, and pond; photograph standing water and any membrane edge that has pulled away.
If your inspector only documents one material type, ask them to note the others in writing. A claim that lists only shingle damage on a home with metal flashing and a flat porch roof leaves money on the table.
What to Do If Your Claim Is Denied
A denial is not the end of the process. Most policies include an appraisal clause that lets you and the insurer each hire an independent appraiser, who pick a neutral umpire if they disagree. You can also request a re-inspection with your contractor present or file a complaint with your state’s department of insurance (naic.org). Keep every letter and email, a paper trail wins appeals.
Do not sign a final settlement or a “release of claim” form until you have a contractor’s written scope of work in hand. Once you sign, you generally cannot reopen the claim for the same storm event.
How Long You Have to File
Every policy sets its own deadline, and the clock usually starts on the date of loss, not the date you noticed the damage. Many policies require prompt notice and separate proof-of-loss deadlines that can run from 60 days to a year depending on the policy and state (naic.org). Read the “Duties After Loss” section, and if you are unsure, ask your agent to confirm the deadline in writing. A missed deadline is one of the few things an insurer can use to deny a claim outright, regardless of how real the damage is.
How Long Does a Roof Inspection Take and What to Expect
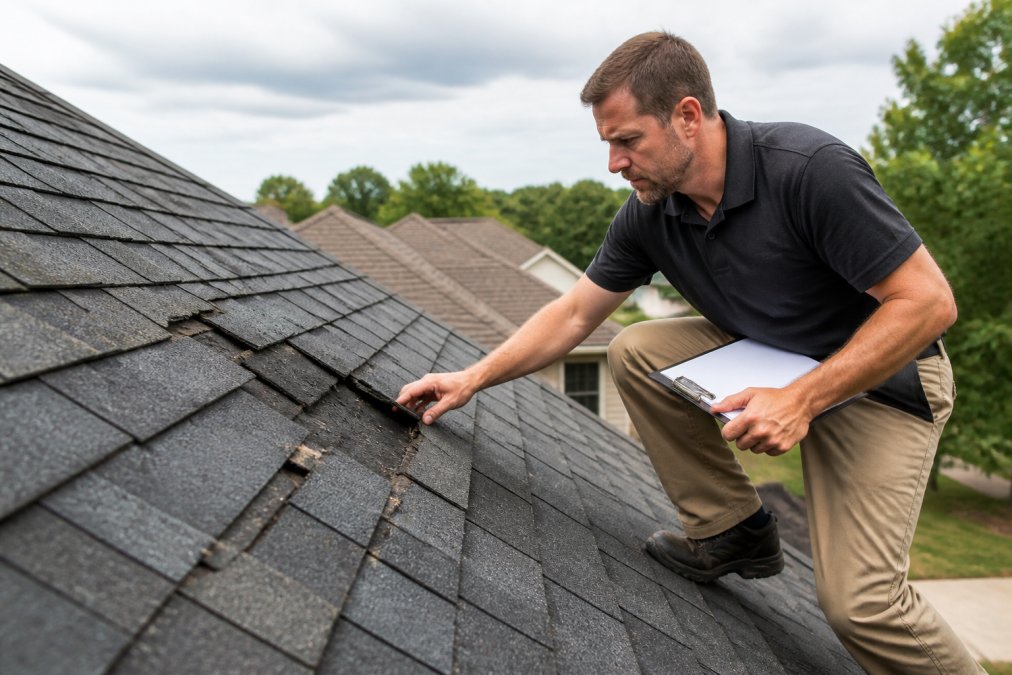
A standard roof inspection takes 45 to 90 minutes for a typical single-family home, longer for complex rooflines, steep pitches, or commercial flat roofs (internachi.org). The visit includes an exterior walk of the roof surface, an attic inspection from inside, and a review of flashing, soffit and fascia, and ventilation. What separates a useful inspection from a quick glance is whether the inspector tests the roof, not just looks at it.
What a Thorough Inspection Actually Covers
A professional inspection follows a sequence, and each step is designed to catch a different failure mode:
- Roof surface walk. The inspector checks for granule loss, bruising, mat fracture, lifted or missing shingles, and exposed fasteners. On metal, they check for dents, oil-canning, and seam separation. On tile, they check for cracked, slipped, or broken tiles and the underlayment beneath.
- Flashing and penetrations. Chimneys, vents, skylights, and valley flashing are where most leaks start. The inspector checks sealant condition, step flashing, and counter-flashing.
- Attic inspection. From inside, the inspector looks at the underside of the decking for water staining, soft spots, and daylight. They check insulation for moisture and look for mold or mildew on rafters.
- Gutters and downspouts. Granule accumulation, dented downspouts, and loose hangers are all evidence of storm impact.
- Ventilation and soffit. Blocked or damaged soffit vents and ridge vents affect moisture control and can signal wind uplift.
Material-Specific Inspection Differences
Asphalt shingle roofs are inspected for granule loss, bruising, and seal integrity. Metal roofs are inspected for dents, seam separation, and fastener back-out, a dent alone is not always a failure, but a dented seam often is. Tile roofs are inspected for cracked and slipped tiles and, critically, the underlayment, the actual waterproofing layer. Flat and low-slope roofs are inspected for membrane blisters, punctures, ponding water, and seam separation. If your inspector does not adjust their method to your roof material, they are working from a generic checklist.
What Your Written Report Should Contain
You should receive a written roof inspection report within a day or two. Ask for photos of every finding, a damage summary by material, and a repair-or-replace recommendation. A useful report also includes:
- A diagram or aerial image of the roof with damage locations marked
- A line-item estimate for recommended repairs, not just a lump sum
- A note on which findings are storm-related versus pre-existing wear
- The inspector’s license or certification number
- A clear statement of what was not inspected and why (for example, an area too steep or unsafe to walk)
If a contractor won’t put findings in writing, that’s a red flag. A verbal “you need a new roof” is not something you can submit to an insurer or use to compare bids.
The 72-Hour Rule vs. Long-Term Leaks
Many believe you must have a roof inspected within 72 hours of a storm or you lose your claim. That is not a universal rule, it is a practical window. Most policies require prompt notice of loss, and adjusters are more skeptical of claims filed weeks later because the damage could have come from a different event. The 72-hour window is when evidence is freshest: granules are still in the gutters, tarps have not been removed, and the storm date is easy to tie to the damage.
Long-term leaks are the opposite problem. A small wind uplift on a ridge cap or a hairline crack in a pipe boot can let water in for months before a ceiling stain appears, and by then the insurer may classify the loss as maintenance rather than storm damage. The inspection you schedule in the days after a storm creates a dated record of the roof’s condition when the damage was fresh, that record protects your claim and your property value, even if the leak does not show up until later.
Schedule the inspection within the first week after a storm, even if you see nothing wrong. The report is your evidence, and evidence is time-sensitive.
Questions to Ask Before You Hire an Inspector
- Are you licensed and insured in this state?
- Do you inspect the attic, or only the roof surface?
- Will I receive a written report with photos and a line-item estimate?
- Do you document damage by material type?
- Do you work directly with insurers, or do I manage the claim myself?
- Is there a fee for the inspection, and is it credited toward repairs if I hire you?
Ask these before the inspector arrives. The answers tell you whether you are getting a documented assessment or a sales pitch.
Risks of DIY Roof Inspections and Post-Storm Safety Protocols
Climbing your own roof after a storm is the single most dangerous thing you can do during recovery. Wet shingles, loose debris, and weakened decking turn a routine walk into a fall risk, and falls from height remain one of the most common home-injury scenarios after severe weather.
Post-storm safety protocols are simple. Stay on the ground. Use binoculars from the yard to spot obvious damage. Keep away from downed power lines and any roof with sagging or visible structural movement. If you smell gas or see sparking, leave the property and call emergency services.
The risks of DIY roof inspections go beyond personal safety. Without training, you’ll miss the subtle indicators that separate a covered claim from a denied one, and you may disturb evidence before an adjuster sees it.
Walking a storm-damaged roof can void your insurance coverage if the insurer determines your activity caused additional damage. Let a professional certification holder do the walking.
The 72-Hour Rule vs. Long-Term Leaks: What You Need to Know
The 72-hour rule matters because most policies require prompt reporting of storm damage, and delays give insurers grounds to question whether the damage is storm-related at all. Three days is not a legal deadline in every policy, but it’s the practical window most adjusters expect.
Conclusion
The homeowners who get storm damage claims approved act within days, not weeks. Waiting lets small problems become structural ones and lets insurers argue the damage wasn’t storm-related.
Rescue Roofing provides thorough inspections with accurate aerial quotes, assists with insurance claim filing, and communicates directly with insurance companies and adjusters so you’re not left managing the paperwork alone. We’re available 24 hours a day for emergencies and offer financing options for full replacements.
Get started with Rescue Roofing and protect your home before the next storm does the deciding for you.
Frequently Asked Questions
Should I get a roof inspection after a hail storm?
Yes. Hail can bruise asphalt shingles and dent metal without obvious signs from the ground. A professional roof inspection catches damage early, before water infiltration causes rot and mold. Most insurers require a timely inspection and documentation to process a claim. If you suspect hail impact, schedule an inspection within days, not weeks.
How long do you have to file an insurance claim for storm damage?
Most policies require you to report storm damage promptly, often within one year of the storm date, but some states and insurers set shorter windows. Oklahoma policies typically allow one year, but waiting can weaken your claim because the insurer may argue the damage is from wear and tear. File as soon as a professional roof inspection confirms damage.
Can I inspect my own roof for storm damage safely?
Walking your roof after a storm is dangerous. Wet shingles, hidden soft spots, and damaged flashing can cause falls. From the ground, you can check for missing shingles, dented gutters, and granules in downspouts, but you cannot see underlayment damage or hairline cracks. A professional roof inspection uses safe access and aerial tools to assess the full roof system.
How long does a roof inspection take?
A typical residential roof inspection takes 45 to 90 minutes, depending on roof size, pitch, and accessibility. A commercial flat roof may take two hours or more. The inspector checks shingles, flashing, underlayment, vents, and attic spaces for water infiltration. You should receive a written roof inspection report with photos, usually within 24 hours.